Difference between revisions of "Active Student Count By Period"
| Line 3: | Line 3: | ||
==Menu Location== | ==Menu Location== | ||
| + | |||
[[File:active student count by period.png]] | [[File:active student count by period.png]] | ||
| − | On the left navigation panel, select | + | |
| + | |||
| + | On the left navigation panel, select Scheduling > Count > Active Student Count By Period'''. | ||
==Setup Options== | ==Setup Options== | ||
Revision as of 10:02, 19 January 2018
This program provides you a count of active students by grade, course, transcript group by class period. For example, if you need a list of all active 9th grade, Jumpstart students enrolled in English I, this program can provide the list.
Menu Location
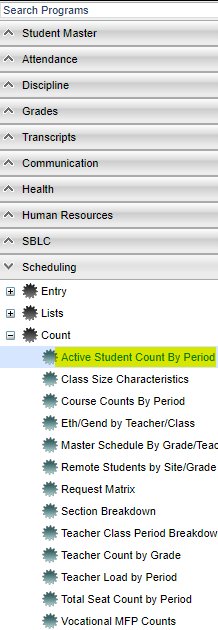
On the left navigation panel, select Scheduling > Count > Active Student Count By Period.
Setup Options
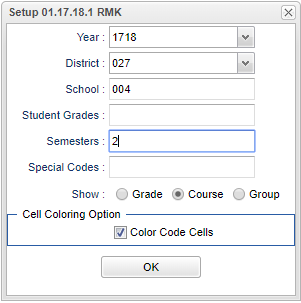
 For this specific set up box, see the definitions below. To find definitions for standard setup values, follow this link: Standard Setup Options.
- Year--Defaults to the current year. A prior year may be accessed by clicking in the field and making the appropriate selection from the drop down list.
- District--Default value is based on your security settings. You will be limited to your district only.
- School--Default value is based on your security settings. If you are assigned to a school, the school default value will be your school site code. You will not be able to change this value. If you are a supervisor or other district office employee with access to the Student Information System, you will be able to run programs for one school, a small group of schools, or all schools in your district.
- Student Grades--Grade level of students whose names are to be included on a report. Leave the field blank if all grade levels are to be included. Otherwise, click in the field to the right of Grade(s) to select the desired grade level(s) to be included.
- Semester--select the desired semester(s) from the popup list.
- Special Codes--Special Codes must have been entered into the Student Master record for students. Leave blank if all special codes are to be included into the report. Otherwise click in the field to the right of Special Codes to select the desired special code(s) to view.
- Show Grade - Process the report by course grade and the first column
- Show Course - process by course name
- Show Group - process by transcript group
- Cell Coloring Option - Check the Color Code Cells checkbox to show color coded cells. On each individual row, Green is the largest count of students and Red is the lowest count .
Click the OK to advance to the next screen.
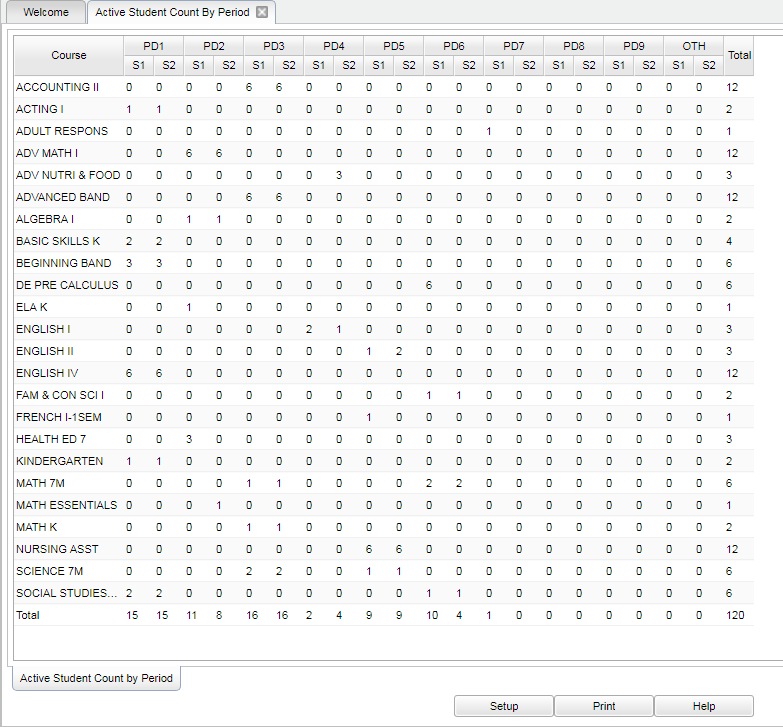
Main
 To find definitions of commonly used column headers, follow this link: Common Column Headers.
Column Headers
- PD1, PD2, ... - periods of the school day
- S1, S2 - semester one and two and/or semester three and four
- Total - The totals along the bottom will give you the student total of that individual column. The totals at the end of the rows gives you that student total.
Bottom
Setup--This button allows you to change the values on the setup box without exiting the program.
Print--To find the print instructions, follow this link: Standard Print Options.
Help--This button links to the JCampus written instructions and/or video.
