Manage Scheduled Calls
This program will provide a way for the user to see scheduled calls and delete them if needed.
Menu Location
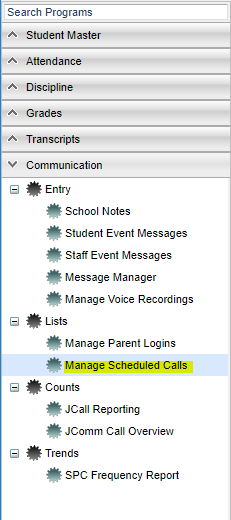
On the left navigation panel, select Communication > Lists > Manage Scheduled Calls.
Setup Options
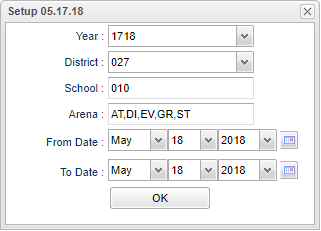
Year - Select desired year.
District - Default value is based on the user's security settings. It will be limited to their district only.
School - Default value is based on the user's security settings. If the user is assigned to a school, the school default value will be their school site code.
Arena - Leave blank to show all scheduled call types. Select to limit display of scheduled calls to a specific type: “EV” = Event, “AT” = Attendance, “DI” = Discipline, “GR” = Grade, "ST" = Staff.
From Date and To Date - A set of dates that limits the selection of records for the report to a beginning date (from) and an ending date (to) range.
OK - Click to continue
To find definitions for standard setup values, follow this link: Standard Setup Options.
Main
Column Headers
Delete - Click to delete this call
Schedule Date - The date and time this call is scheduled to run
Create Date - The date and time this call was created
Created By - The username of the person who created this call
Title - Title of the call being made
Call Description - Description of the call being made
Arena - The arena or area of this call
Call Type - The delivery method used for this call
Count - Distinct count of students/staff to be contacted
Edit - Edit the time and message for a call.
To find definitions of commonly used column headers, follow this link: Common Column Headers.
How-to
- On screen will be a listing of scheduled calls based on the Setup box settings.
- To delete a scheduled call, locate the column on the far left labeled Delete.
- Browse down to the row of the scheduled call to be deleted.
- Click on the red Delete cell at the start of the row. A dialog box will appear asking if the user really wants to delete the scheduled call.
- Click Yes to delete the scheduled call. Click NO to stop the deletion and return to the Manage Scheduled Calls screen.
Print - This will allow the user to print the report.

