Special Education List Report
This program lists all special education students.
Menu Location
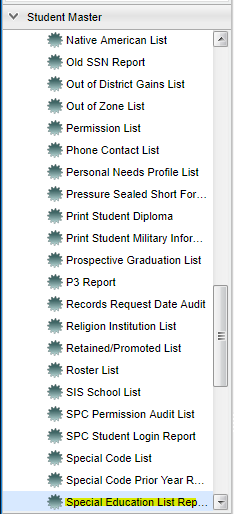
On the left navigation panel, select Student Master > Lists > Special Education List Report.
Setup Options
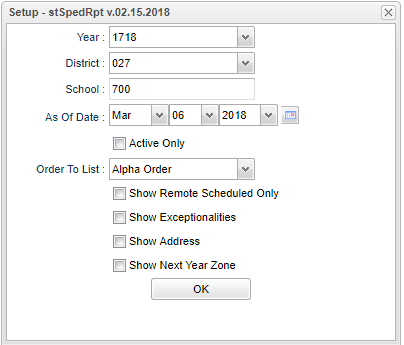
Year - Defaults to the current year. A prior year may be accessed by clicking in the field and making the appropriate selection from the drop down list.
District - Default value is based on your security settings. You will be limited to your district only.
School - Default value is based on your security settings. If you are assigned to a school, the school default value will be your school site code. You will not be able to change this
value. If you are a supervisor or other district office employee with access to the Student Information System, you will be able to run programs for one school, a small group of schools, or
all schools in your district.
Active Only and As of Date - This choice will list only those students who are actively enrolled as of the date selected in the date field.
Order To List - Allows for the list to be sorted in the desired way upon clicking OK.
Show Remote Only - If this box is checked, the report will list only those students who come to your school from another school in the district.
Show Exceptionalities - The area of functioning in which he or she is significantly different from an established norm.
Show Address - Show student's address
Show Next Year Zone - Check this box if student will be going to another school/different zone to show on report.
OK - Click to continue
To find definitions for standard setup values, follow this link: Standard Setup Options.
Main
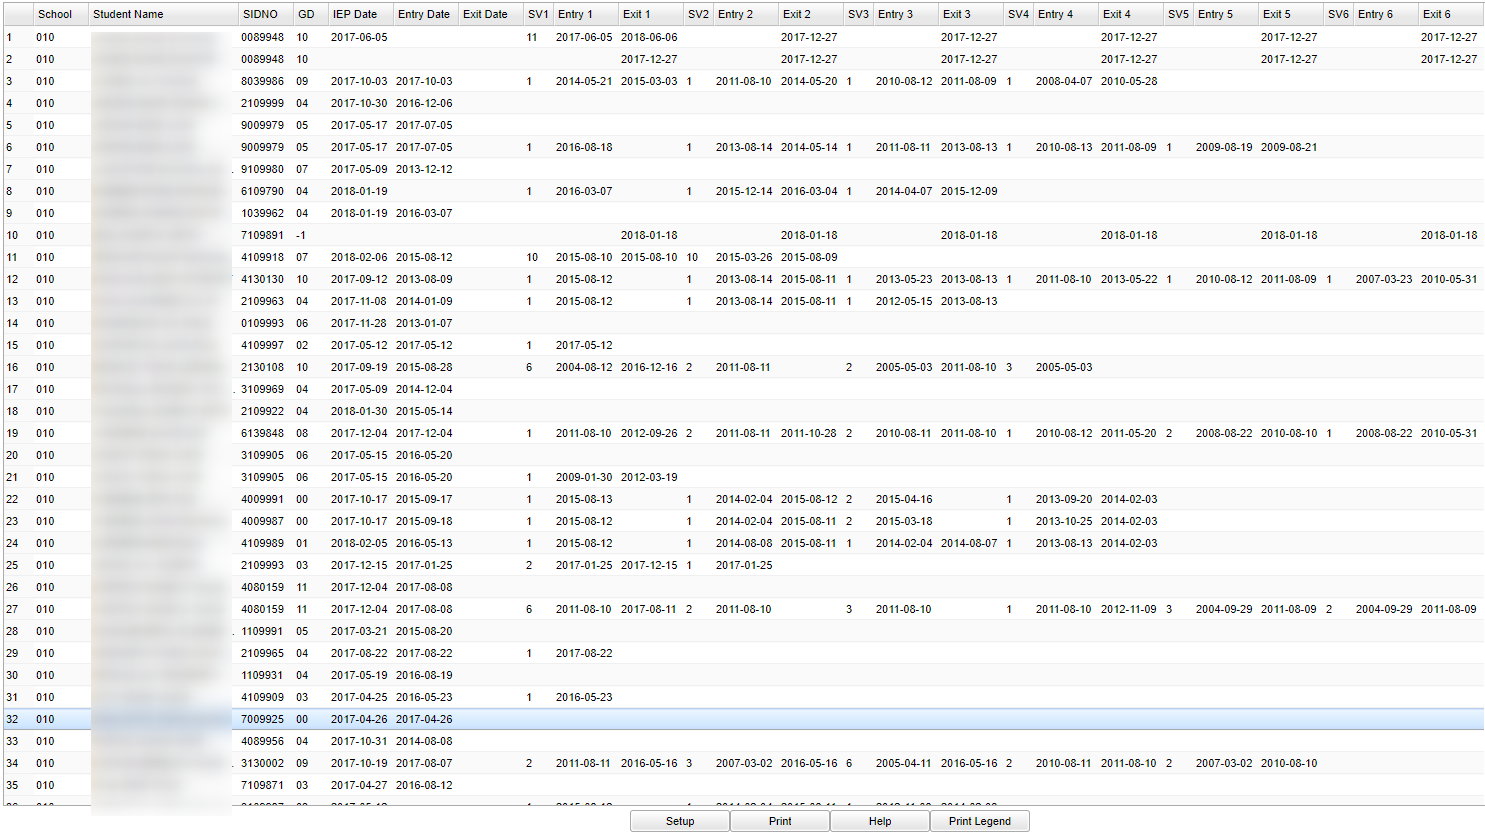
Column Headers
To find definitions of commonly used column headers, follow this link: Common Column Headers.
For other columns not listed in the common column list:
- SVC--Supplementary Service Code
- Entry 1--Service Start Date
- Exit 1--Service Exit Date
Add Zone School if DMS is active to the table.
Buttons at the bottom of the display
- Setup--This allows you to change the values on the setup box without exiting the program.
- Print--Use this button to print the report displayed on the screen. Refer to the instructions below for printing the report.
- Help--This button links to the JCampus written instructions and/or video.
- Legend--Click on the Legend button. After the "Print Document' appears, just click Print and the Legend appears in a PrintServlet.
Print Options
To find the print instructions, follow this link: Standard Print Options.
NOTE: Sorting and other data manipulations are explained in the following link: List Programs Instructions/Video


