Difference between revisions of "Course Name Consolidation"
| Line 103: | Line 103: | ||
[[File:mb329.png]] | [[File:mb329.png]] | ||
| + | |||
| + | By selecting '''yes''', it will update '''ALL''' areas stated in the pop up box. By selecting '''no''', it will only change the verbiage in the Master Schedule Editor. | ||
| + | |||
| + | |||
| + | [[File:mb330.png]] | ||
<span style="color:red"> NOTE </span> - When selecting a course name from the left that has a '''Grade Type''' and the course name from the right does not, the Grade Type will not transfer with the consolidation. When selecting a course name from the left that does not have a '''Grade Type''' and the course name from the right does, the consolidated course will now have a Grade Type. | <span style="color:red"> NOTE </span> - When selecting a course name from the left that has a '''Grade Type''' and the course name from the right does not, the Grade Type will not transfer with the consolidation. When selecting a course name from the left that does not have a '''Grade Type''' and the course name from the right does, the consolidated course will now have a Grade Type. | ||
Revision as of 09:21, 2 April 2018
This program will allow the user to consolidate course names or records to one course record.
Menu Location
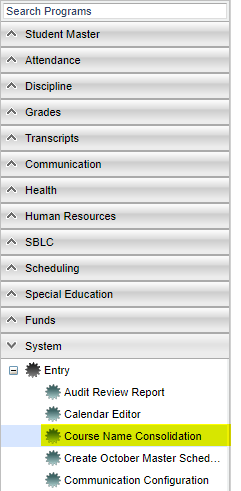
On the left navigation panel, select System > Entry > Course Name Consolidation.
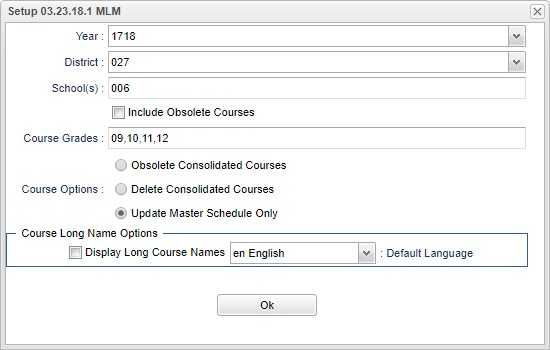
Setup Options
Year - Defaults to the current year. A prior year may be accessed by clicking in the field and making the appropriate selection from the drop down list.
District - Default value is based on your security settings. You will be limited to your district only.
School(s) - Default value is based on your security settings. If you are assigned to a school, the school default value will be your school site code. You will not be able to change this value. If you are a supervisor or other district office employee with access to the Student Information System, you will be able to run programs for one school, a small group of schools, or all schools in your district.
- Include Obsolete Courses - Check the box to include obsolete courses.
Course Grades - This option limits the courses to a specific set of course grade levels to process.
Course Options
- Obsolete Consolidated Courses - This makes the consolidated courses obsolete.
- Delete Consolidated Courses - This deletes the consolidated course (left table courses).
- Update Master Schedule Only - This only updates the master schedule (and students schedules, grades, blocks, and assignments - another option when the okay button is clicked), but does not change the course master record.
Course Long Name Options - Select this option to display the long course name in the master schedule screen.
To find definitions for standard setup values, follow this link: Standard Setup Options.
OK - Click to continue.
Main
Column Headers
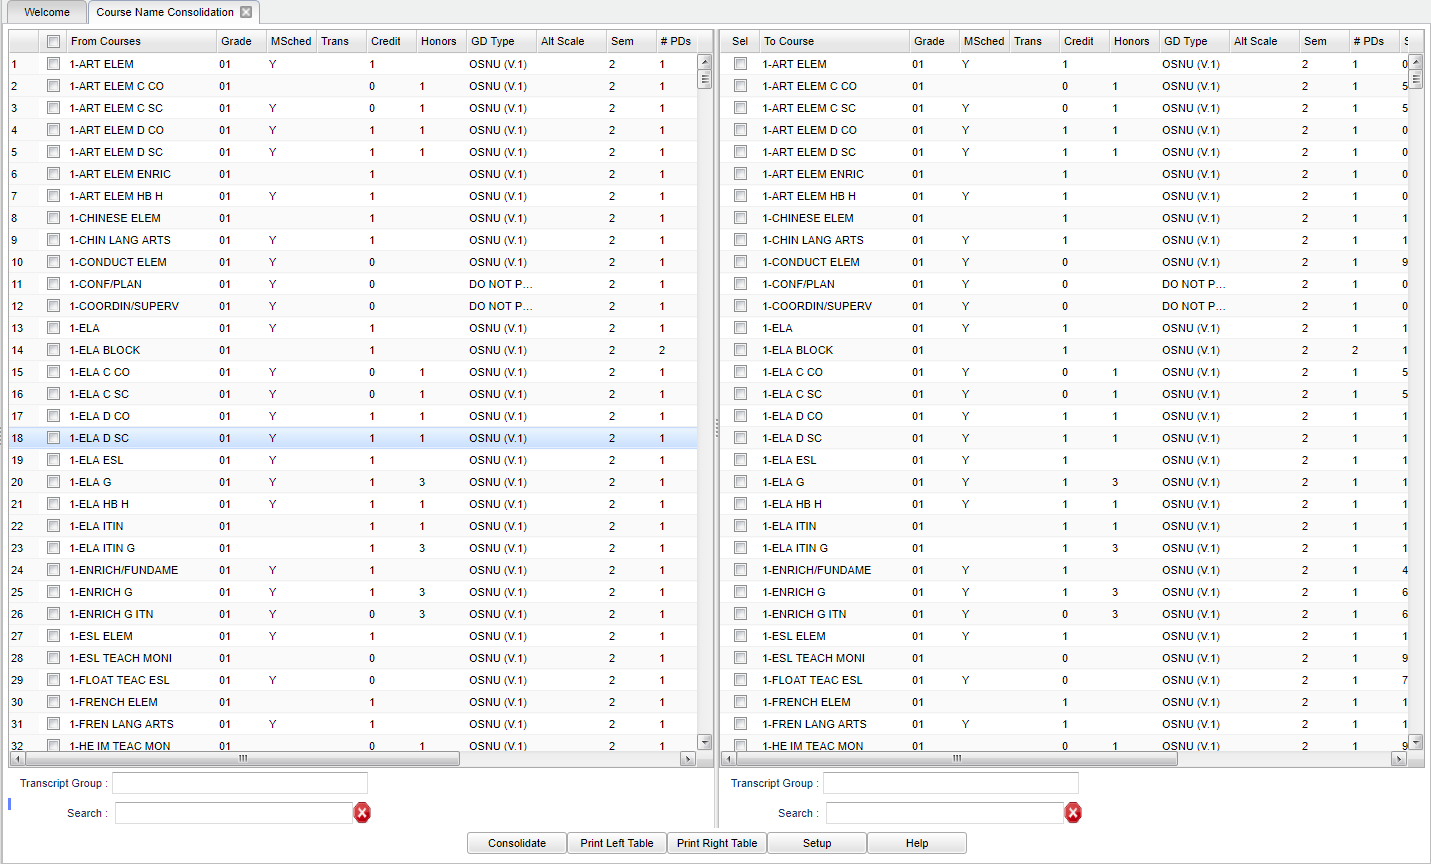
From Courses: Local Course Name (on the left table) and To Course: Local Course Name (on the right table).
Long Name: Course Long Name.
Grade: Course Grade Level.
MSched: Course is in the Master Schedule.
Trans - Course is in Transcripts.
Credit - Credit Value of Course.
Honors - Honor Codes Associated with Course
GD Type - Grade Scale for this Course Record.
Alt Scale - Does this Course Records Use an Alternate Scale: Yes or No.
Sem - Number of Semesters the Course Lasts.
#PDs - Number of Periods the Course Lasts.
State Code - State Course Code Number.
Local Code - Local Number.
Group - Transcript Group Code.
School - School Number Where Course is Taught - coschool.
Recnum - Record Number.
Transcript Group - Select to narrow the search; English, Computer Education, Math, Social Studies, Science, Health & PE, Foreign Languages, Vocation Ed Electives, Regular Ed Electives.
Search - Only the first character matching the key clicked on the keyboard is used to find the matching value for the last column header clicked in the grid. Use the input box to incrementally search for a value.
To find definitions of commonly used column headers, follow this link: Common Column Headers.
Bottom
Consolidate - Click to consolidate the selected courses.
Print Left Table - To find the print instructions, follow this link: Standard Print Options.
Print Right Table - To find the print instructions, follow this link: Standard Print Options.
Setup - This allows you to change the values on the setup box without exiting the program.
Help - Takes you to the Help website for written instructions and instructional videos.
Consolidating Courses
To consolidate a course name, check the box next to name of the course(s) from the From Course section on the left side of the screen. Next, check the box next to the name of the course from the To Course section on the right side of the screen. More than one course name can be selected from the left side of the screen. Only one course name can be selected from the right side of the screen. Then, click on Consolidate button located on the bottom of the screen.
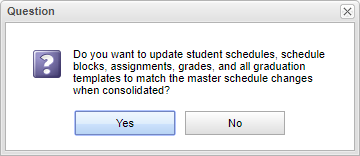
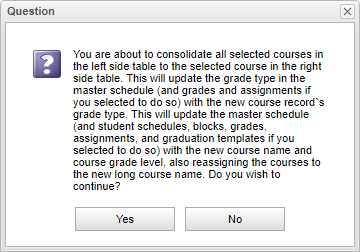
Once selected, a popup box will appear asking:
By selecting yes, it will update ALL areas stated in the pop up box. By selecting no, it will only change the verbiage in the Master Schedule Editor.
NOTE - When selecting a course name from the left that has a Grade Type and the course name from the right does not, the Grade Type will not transfer with the consolidation. When selecting a course name from the left that does not have a Grade Type and the course name from the right does, the consolidated course will now have a Grade Type.
