Difference between revisions of "Post Grades By Student"
(→Top) |
(→Top) |
||
| Line 123: | Line 123: | ||
| − | + | '''iGear''' - [[Using the iGear | '''iGear''']] | |
[[File:sch43.png]] | [[File:sch43.png]] | ||
| − | |||
'''Show Grade Change Information''' | '''Show Grade Change Information''' | ||
Revision as of 03:34, 16 October 2018
Video
Menu Location
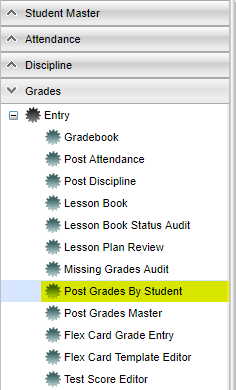
On the left navigation panel select Grades > Entry > Post Grades by Student.
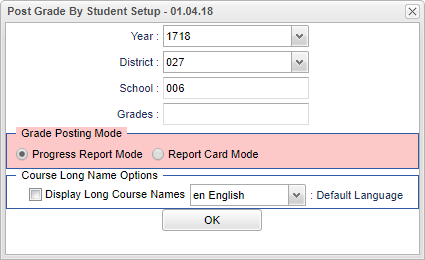
Setup Options
Year: Defaults to the current year. A prior year may be accessed by clicking in the field and making the appropriate selection from the drop down list.
District: Default value is based on your security settings. You will be limited to your district only.
School: Default value is based on your security settings. If you are assigned to a school, the school default value will be your school site code. You will not be able to change this value. If you are a supervisor or other district office employee with access to the Student Information System, you will be able to run programs for one school, a small group of schools, or all schools in your district.
Grade Posting Mode
- Select Progress Report Mode if grades are to be entered/edited, but no semester/final averages are to be calculated.
- Select Report Card Mode if grades are to be entered/edited, and semester/final averages are to be calculated.
Course Long Name Option
- Check the box next to Display Ling Course Name - Select this option to display the long course name in the master schedule screen. The default language is English.
Click OK to continue.
To find definitions for standard setup values, follow this link: Standard Setup Options.
Main
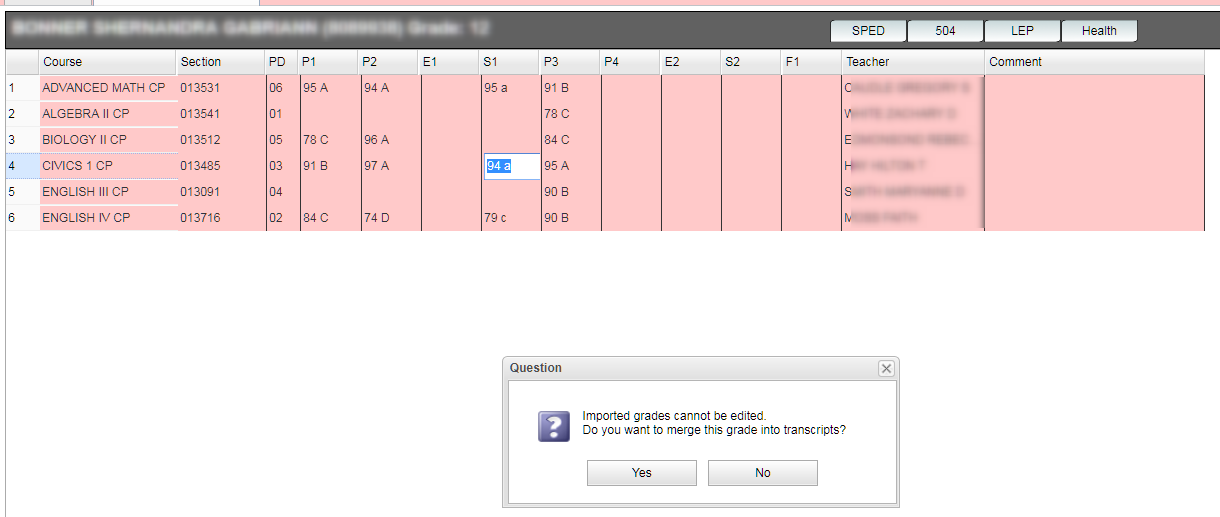
Column Headers
Course - The curriculum course name.
Section - The class section number assigned to course from the Master Schedule Editor.
PD - The class period assigned to section from the Master Schedule Editor.
P1 through P6 -the grading periods for the school (P5 and P6 should not appear if the School has nine weeks grading periods) {P7, P8 are present for 4 x 4.5 schools}
E1 and E2 -exam grades (E3, E4 are present for 4x4 schools)
S1 and S2 - semester averages (S3, S4 are present for 4x4 schools)
F1 - final grade (F2 is present for 4x4 schools)
Teacher - teacher for the course
Comment - the comments assigned to the section from the Master Schedule
To find definitions of commonly used column headers, follow this link: Common Column Headers.
How to Post Grades
Select the FIND button on the bottom of the page to populate a list of students to select student.
Note: After choosing the student`s name, it will appear at the top. If it is pink, then the student has been dropped. If it is yellow, the student is absent.
Click on the student`s name for his/her courses and grades to appear.
Click in the cell to post a new grade and click the SAVE button at the bottom right of the page.
If an existing grade needs to be either deleted or changed:
- To delete an existing grade, highlight the grade that needs to be removed and backspace over to delete the grade.
- To change an existing grade, highlight the grade and enter the correct grade. NOTE - Once the grade has been changed and saved, it will then display in bold font.
Select Submit. To view all of the changes, go to the Action (tab) located in the top right corner. Click to drop down, select Show Grade Change Information. For further instructions see below under TOP, then Action Menu.
NOTE - Click the SAVE button at the bottom right of the page.
For Semester 1 (S1), Semester 2 (S2), and Final (F1)[4x4 schools will additionally see S3, S4, and F2 for Spring courses], the calculated letter values will be in lower case, signifying that the grade has been auto calculated by the program. If the user manually enters a Semester or Final grade, the letter value will be in upper case.
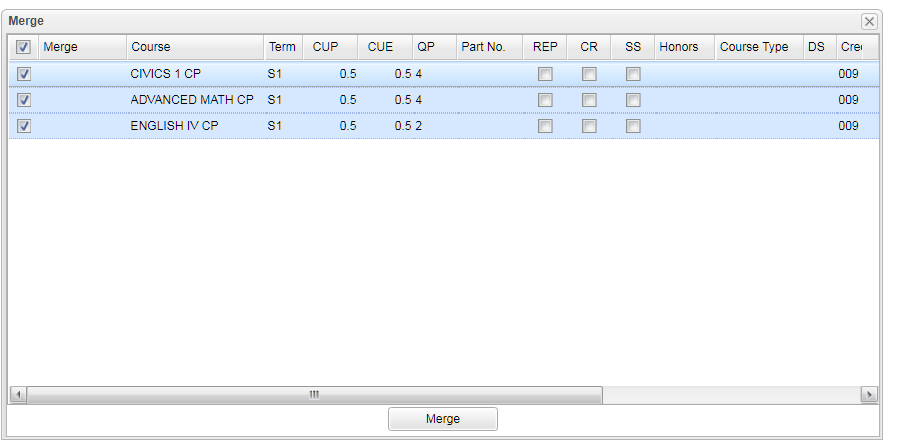
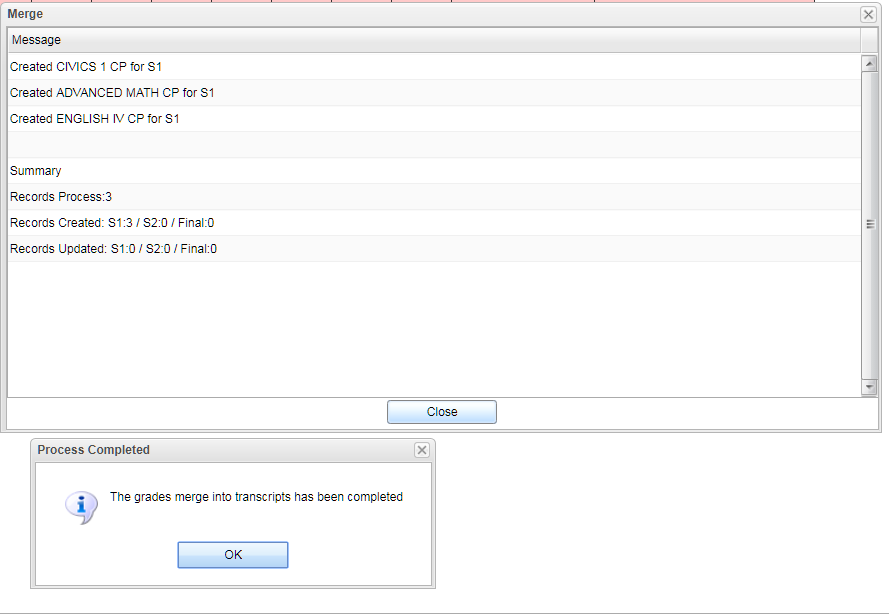
Imported Grades - Grades that have been imported from other districts in the re-enroll process will be highlighted red. You will need security rights to Post Grades by Student to merge imported grades into the transcript.
Bottom
Save - To save the entries or deletions.
Previous - Move to the previous student`s name.
Next - Move to the next student`s name.
Setup - Click to go back to the Setup box.
Find - Used to populate a list of students to choose from.
Print - This will allow the user to print the report.
Help - Click to view written instructions and/or videos.
Top
Sped--indicates the status of a student in Sped by different colors:blue-special ed record, yellow-has an expired IEP, red-Acitve IEP, gray-speech only, and purple-gifted and/or talented
504--indicates if the student has accommodations and the student`s disabilities
LEP--limited English proficiency
Health--indicates a health plan if RED
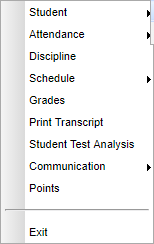
Action Button
iGear - iGear
Show Grade Change Information
- Sch - School site of enrollment
- SIDNO - Student identification number.
- Change User - User who edited/deleted the grade recorded.
- Change Date - The time stamp of the grade record was edited/deleted.
- Change Reason - The reason of the user for the grade record edit/deletion.
- Change Data - Relevant details pertaining to the grade record edit/deletion.
Print - To find the print instructions, follow this link: Standard Print Options.
