Difference between revisions of "Fees Management"
| Line 72: | Line 72: | ||
#Click in the '''Comment''' cell to enter additional information about the payment. | #Click in the '''Comment''' cell to enter additional information about the payment. | ||
#Click the '''Save''' button.<br>[[File:history fee3.jpg]] | #Click the '''Save''' button.<br>[[File:history fee3.jpg]] | ||
| + | #After you have saved the final payment, click on the '''Edit''' tab, and enter a close date for the fee. | ||
#By clicking on a '''Fee''' name from the Fees portion of the screen, you can see payments/adjustments to the fee highlighted in the '''History''' portion of the screen. | #By clicking on a '''Fee''' name from the Fees portion of the screen, you can see payments/adjustments to the fee highlighted in the '''History''' portion of the screen. | ||
#To '''Edit''' an amount entered for payment on a fee, you must '''Delete''' it using the <span style="color:Red"> Delete field</span> under the Delete column on the '''History''' for the fee.<br>[[File:history fee2.jpg]] | #To '''Edit''' an amount entered for payment on a fee, you must '''Delete''' it using the <span style="color:Red"> Delete field</span> under the Delete column on the '''History''' for the fee.<br>[[File:history fee2.jpg]] | ||
Revision as of 15:54, 1 September 2016
This program lets you enter fees on individual students and update account receivable on fees.
On the left navigation panel, select Student Master, Entry, and Fees Management.
Setup Box Options
To find definitions for standard setup values, follow this link: Standard Setup Options.
Other set up values not listed in the standard set up list:
- Show Only Open Fees - show fees that have balances due.
The page is divided into two sections: Fees and History
Fees
Fees is where you add your fees to a student.
You can add an unlimited number of fees to a student and keep track of payment.
- Find the student using the Find tab at the bottom of the screen.
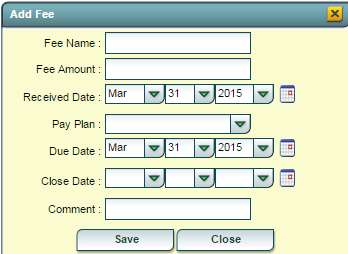
- Click the Add Fee tab to display a box to enter the information about fee to be added.
- Fee Name: Select the name of the Fee from the drop down list.
- Fee Amount: Enter the amount of the fee here.
- Received Date: Enter the Accounts receivable date.
- Pay Plan: Select from the drop down one of the following: 0-Due Now, 1-30 Days, 2-30/60 Days, 3-30/60/90 Days, 4-Monthly Due, 5-Monthly Accrued, 6-Monthly Reduced
- Due Date: Click to set the Fee Due Date.
- Close Date: Click to set the actual payoff date of the fee.
- Comment: Click to enter any comment(s) about the fee.
- Save: Click to Save the transaction.

Column Headers
To find definitions of commonly used column headers, follow this link: Common Column Headers.
Other columns not listed in the common column list:
- Edit - Edit fee
- Fee - Name of fee
- Comment - Fee comment
- Total - Total amount of fee
- Due - Fee due date
- Last Pay Date - Date of last payment
- Delete - Delete this fee
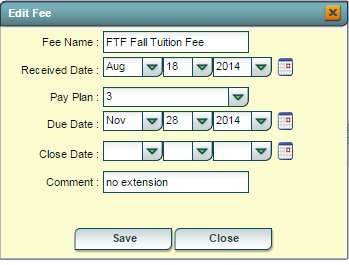
Once a fee has been added and saved, it can be edited by:
- Clicking on the edit symbol (see arrow).
- Make changes to your Edit Fee page.
- Click Save.


The only way to delete a fee added is using the Delete field under the Delete column. The entire entry has to be deleted. Once you click the delete field, you will get the following confirmation question.
History
History is where payments/adjustments are made to fees.
- Find the student using the Find tab
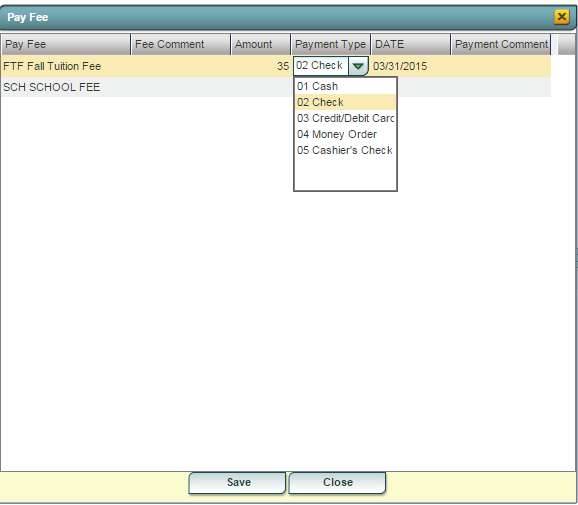
- Click Pay fee tab at the bottom and a list of fee(s) owed by the student will appear.
- Highlight the fee to be paid.
- Fee Comment can not be edited.
- Enter the Amount to be paid on the fee.
- Select the Payment Type.
- Click to set the Date fee was paid.
- Click in the Comment cell to enter additional information about the payment.
- Click the Save button.
- After you have saved the final payment, click on the Edit tab, and enter a close date for the fee.
- By clicking on a Fee name from the Fees portion of the screen, you can see payments/adjustments to the fee highlighted in the History portion of the screen.
- To Edit an amount entered for payment on a fee, you must Delete it using the Delete field under the Delete column on the History for the fee.


Action Tab
All Printing is done under the Action Tab in the upper right corner
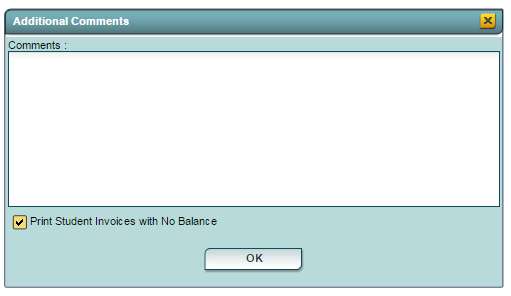
1. Printing All Invoices - prints a per page invoice for students based on the setup.
- Additional Comments - you may add a comment to the invoice. It will print on every invoice.
- Print Student invoices with No balance - In addition to students with a balance, this will also print student invoices with a Zero balance.

2. Print Fees - prints all fees for the student chosen under the Find tab
- To Print this Report
- Click the Print button at the bottom of the screen.
- A popup will appear with a set of document print options--PDF, XLS, CSV, HTML.
- The default print option will be PDF.
- Click the print icon at the right end of this rectangle. Another print preview will appear.
- Click the print button at the top left to print the report. Close the print preview.
3. Print History - prints the history of a fee highlighted from the Fees section of the report
4. Print Invoice - statement that shows charges/payments for a student.
- To Print this Report
- Click the Print button at the bottom of the screen.
- A popup will appear with a set of document print options--PDF, XLS, CSV, HTML.
- The default print option will be PDF.
- Click the print icon at the right end of this rectangle. Another print preview will appear.
- Click the print button at the top left to print the report. Close the print preview.
5. Print Statement - statement that shows all transactions on a from date/to date with a closing balance as of the to date.
Print Options
- To find the print instructions, follow this link: Standard Print Options.