Difference between revisions of "DAS Mass Loader"
| Line 21: | Line 21: | ||
'''Folder''' - Choose the folder that the documents were uploaded to by highlighting and clicking OK. | '''Folder''' - Choose the folder that the documents were uploaded to by highlighting and clicking OK. | ||
| − | '''Replace''' - Choose what to do with duplicate filenames. Replace will overwrite all of the files. | + | '''Replace''' - If the file is exactly the same name, it will replace the file completely. Choose what to do with duplicate filenames. Replace will overwrite all of the files. |
| − | '''Rename''' - Choose what to do with duplicate filenames. Rename will add a -1 to the end of the original file name. | + | '''Rename''' - If the file is exactly the same name, it will rename the file completely. Choose what to do with duplicate filenames. Rename will add a -1 to the end of the original file name. |
'''Choose Documents''' - Click to choose the document to import from where it is stored on your computer. The number of files chosen will appear below. | '''Choose Documents''' - Click to choose the document to import from where it is stored on your computer. The number of files chosen will appear below. | ||
Revision as of 11:12, 11 May 2020
This program is a fast loader for the Document Archive System (DAS) and provides the user a way to mass import scanned documents to be viewed in Student Master.
- Using a printer/scanner, the user will need to first scan the individual documents to their computer's scan folder, one at a time. A naming process will be needed so follow the instructions of your scanning equipment.
- The file format MUST start with the student's local identification number followed by an underscore with the appropriate area.
- The user can select the Category document type (Student, Discipline, SBLC, Human Resources) for Doc Archive of which to load, and then, the files to import. This will allow loading by category to speed up the import to DAS.
- Category types must be previously setup through the System Configuration program.
Menu Location
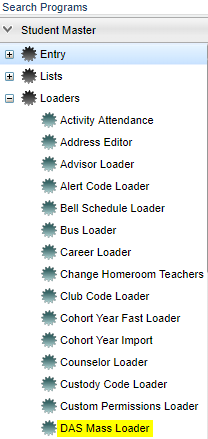
On the left navigation panel select Student Master > Loaders > DAS Mass Loader.
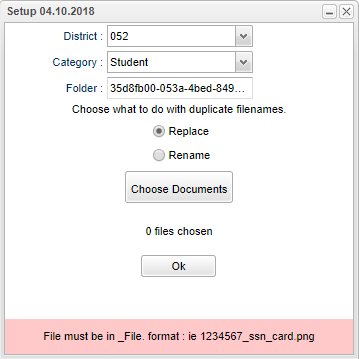
Setup Options
District - Default value is based on the user’s security settings. The user will be limited to their district only.
Category - Choose the category assigned to this document.
Folder - Choose the folder that the documents were uploaded to by highlighting and clicking OK.
Replace - If the file is exactly the same name, it will replace the file completely. Choose what to do with duplicate filenames. Replace will overwrite all of the files.
Rename - If the file is exactly the same name, it will rename the file completely. Choose what to do with duplicate filenames. Rename will add a -1 to the end of the original file name.
Choose Documents - Click to choose the document to import from where it is stored on your computer. The number of files chosen will appear below.
OK - Click to continue.
To find definitions for standard setup values, follow this link: Standard Setup Options.
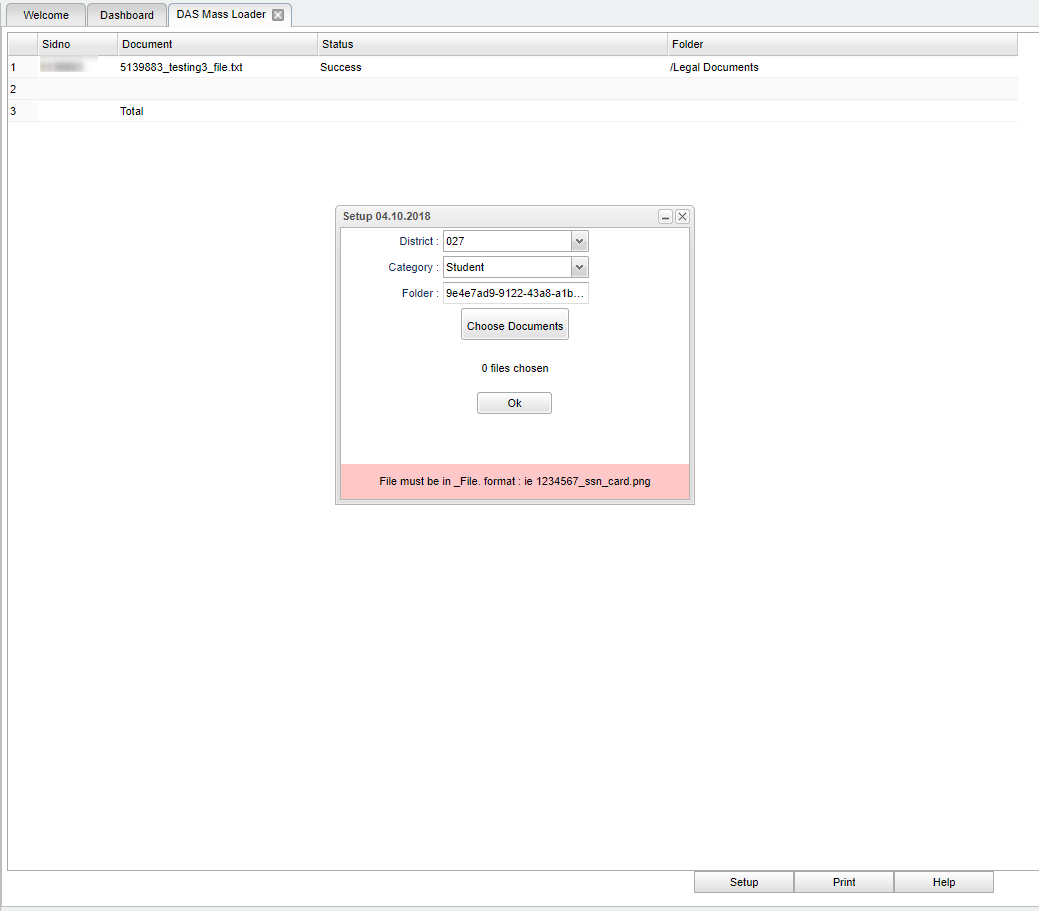
Main
Column Headers
Sidno - This is the Student's identification number.
Document - This is the Document Name.
Status - This is the document status.
Folder - This is the folder uploaded to.
To find definitions of commonly used column headers, follow this link: Common Column Headers.
Bottom
Setup - Click to go back to the Setup box.
Print - This will allow the user to print the report.
Help - Click to view written instructions and/or videos.


