Difference between revisions of "School Notes"
| Line 97: | Line 97: | ||
---- | ---- | ||
| − | :[[ | + | :[[Communication|'''Communication''' Main Page]] |
---- | ---- | ||
:[[WebPams|'''JCampus''' Main Page]] | :[[WebPams|'''JCampus''' Main Page]] | ||
Revision as of 05:47, 9 April 2018
This program will allow a school to create notes to be displayed in the Student Progress Center. It will not generate a phone call, text or email.
Menu Location
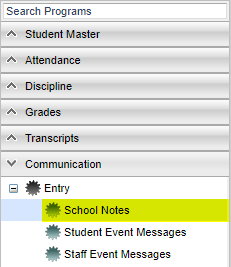
On the left navigation panel select Communication > Entry > School Notes.
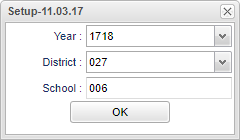
Setup Options
Year - Defaults to the current year. A prior year may be accessed by clicking in the field and making the appropriate selection from the drop down list.
District - Default value is based on your security settings. You will be limited to your district only.
School - Default value is based on your security settings. If you are assigned to a school, the school default value will be your school site code. You will not be able to change this value. If you are a supervisor or other district office employee with access to the Student Information System, you will be able to run programs for one school, a small group of schools, or all schools in your district.
To find definitions for standard setup values, follow this link: Standard Setup Options.
OK - Click to continue.
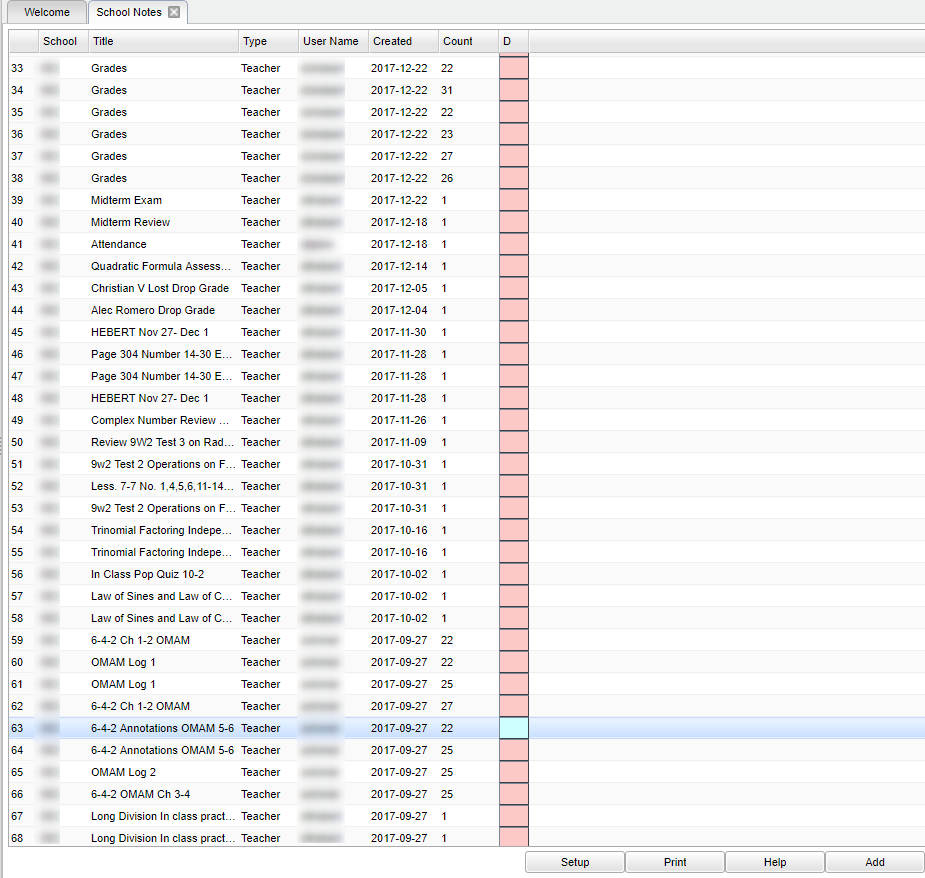
Main
Column Headers
School - School site of enrollment.
Title - Title of the note being sent out.
Type - Refers to the type of message being sent.
User - The login of the user who created the message.
Created - The date the message was created.
Count - The number of students who received the message. Click on the number to see a list of students who received the message in Student Progress Center.
DEL - Delete the message from the list.
To find definitions of commonly used column headers, follow this link: Common Column Headers.
Bottom
Setup - This takes you to the Setup options that can be changed to view a different set of students.
Print - To find the print instructions, follow this link: Standard Print Options.
Help - This takes you to written instructions and instructional videos.
Add - Select the Add button to create a note.
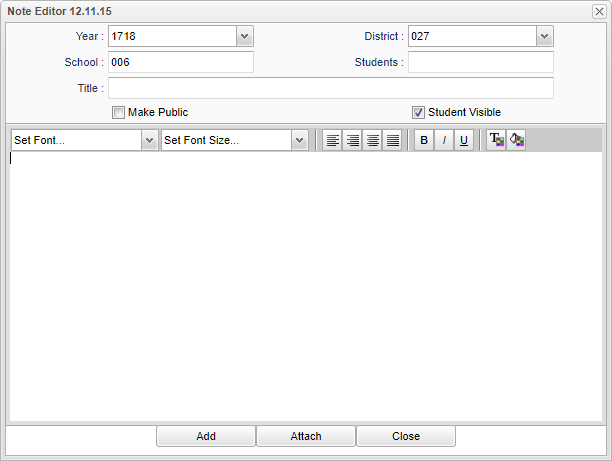
Year - Defaults to the current year. A prior year may be accessed by clicking in the field and making the appropriate selection from the drop down list.
District - Default value is based on your security settings. You will be limited to your district only.
School - Default value is based on your security settings. If you are assigned to a school, the school default value will be your school site code. You will not be able to change this value. If you are a supervisor or other district office employee with access to the Student Information System, you will be able to run programs for one school, a small group of schools, or all schools in your district.
Title - Name the message that will be sent out.
Students - Click in the box for a list of students to select from to send a message to. Use the different fields to send to a specific group of students, or if the box is left blank, a message will display to all students.
Make Public - By checking this box, and the district displays the "Browse" button on the Student Progress Center, the Note will be visible to everyone who visits the Student Progress Center without requiring a username and password.
Student Visible - By checking this box, the message will only be visible to parents, guardians and students who have a username and password, in Student Progress Center.
Type the message that will be sent out to Student Progress Center.
Add - Select this button to send the message to Student Progress Center.
Attach - Select this button to add an attachment. The attached file size is <=1 MB. Once the attachment is added, select the Add button to send the message. Note - The note has to first be saved before a file can be attached to it.
Close - Close the message that has been created.
NOTE: Sorting and other data manipulations are explained in the following link: List Programs Instructions/Video


