Difference between revisions of "Post Excuse"
| Line 25: | Line 25: | ||
*'''Print Receipt Label''' - | *'''Print Receipt Label''' - | ||
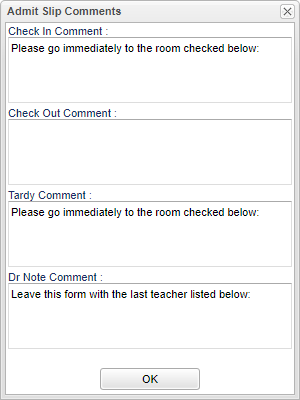
**'''Add Comment''' - | **'''Add Comment''' - | ||
| + | **[[File:mb264.png]] | ||
==Main== | ==Main== | ||
Revision as of 05:29, 14 March 2018
Video How-to
Menu Location

On the left navigation panel select Attendance > Entry > Post Attendance.
Setup Options

Year - Defaults to the current year. A prior year may be accessed by clicking in the field and making the appropriate selection from the drop down list.
District - Default value is based on your security settings. You will be limited to your district only.
School - Default value is based on your security settings. If you are assigned to a school, the school default value will be your school site code. You will not be able to change this value. If you are a supervisor or other district office employee with access to the Student Information System, you will be able to run programs for one school, a small group of schools, or all schools in your district.
1st PD Code - Select a code to insert when using the '1st' column to do a first period check-out.
- Auto Admit -
- Show keyboard -
- Print Receipt Label -
- Add Comment -

Main

Column Headers
Bottom
![]()
- On the left navigation panel, click on Attendance.
- Under Entry, select Post Attendance.
- If you need instructions for setup values to be used, follow the link for Standard Setup Options.
- The next items are not found on the standard setup options document.
- 1st PD Code defaults to code 05 Doctor's note needed. To change the default code, click in the field to get a list of codes.
- Select the appropriate code as a default code.
- Check Auto Admit to have the system automatically print admit slips when checking a student out or checking a student in.
- Check Show Keyboard to be able to see the alpha keys in addition to the search box.
- Click on Add Comment to bring up a dialog box that allows personalized comments to be set for each of the different admit slips.There are defaulted comments but they can be changed.
- Verify the number of minutes for Lunch and for Non-Instr Minutes.
- Click OK.
- To get a list of students:
- Click on the Student button at the bottom of the screen to get a complete list of the schools students.
- Click on the Homeroom button to get a list of Homeroom teachers. Select a Homeroom teacher to get their list of students on the screen.
- Click on the Class button to get the Master Schedule. Select a class to get a list of students in that class on the screen.
- Click on the Bus button and a popup box will appear. Then select the a bus for a list of students.
- Click on the Sport/Club button for a list of clubs and a list of sports in which the students are active in.
- Click on the Special Code button and a popup box will appear. Then select the code for a list of students.
- Click on the Setup button to display the original setup box with the previously selected settings displayed.
- Click on the Mass button and a popup box will appear. Select the students on the screen to post mass attendance.
- Click on the Help button to locate JCampus documentation which includes written instructions and/or videos.
- If an excuse needs to be posted for a student’s prior absences, with the Post Attendance program open with the students listed on the screen, find the student.
- Once the student has been found, to the right along the same row, find the column labeled DR. Click in the cell.
- A table listing all the student’s prior days’ absences will appear. Locate the absences to be excused. After locating them, go to the cell on the row of the absence to be excused and below the column header DRCD. Click in that cell.
- After clicking, a list of excuses will appear. Select the appropriate excuse.
- If the checkout reason is a medical reason, an additional box will appear listing medical reasons. Find the medical reason that best fits the situation.
- To the left of the medical reasons are check boxes in columns labeled MI, MO, and SE.
- MI = Mild
- MO = Moderate
- SE = Severe
- Select the appropriate severity of the medical reason for the student’s checkout.
- Once the excuse has been posted, the DR REASON can be changed to fit a more unique event. To do this, simply click on the cell with the DR REASON to be changed.
- A text box will appear containing the existing DR REASON. Change the information to the desired description then click Save.
- If the excuse was placed on the wrong absence, a red cell is located to the right. Click on the red cell to delete the excuse.
- After clicking the red delete cell, a deletion verification box will appear. Click Yes if you are sure you would like to delete the excuse for the displayed date. Click No to cancel.