IHP
From EDgearWiki
Jump to navigationJump to search
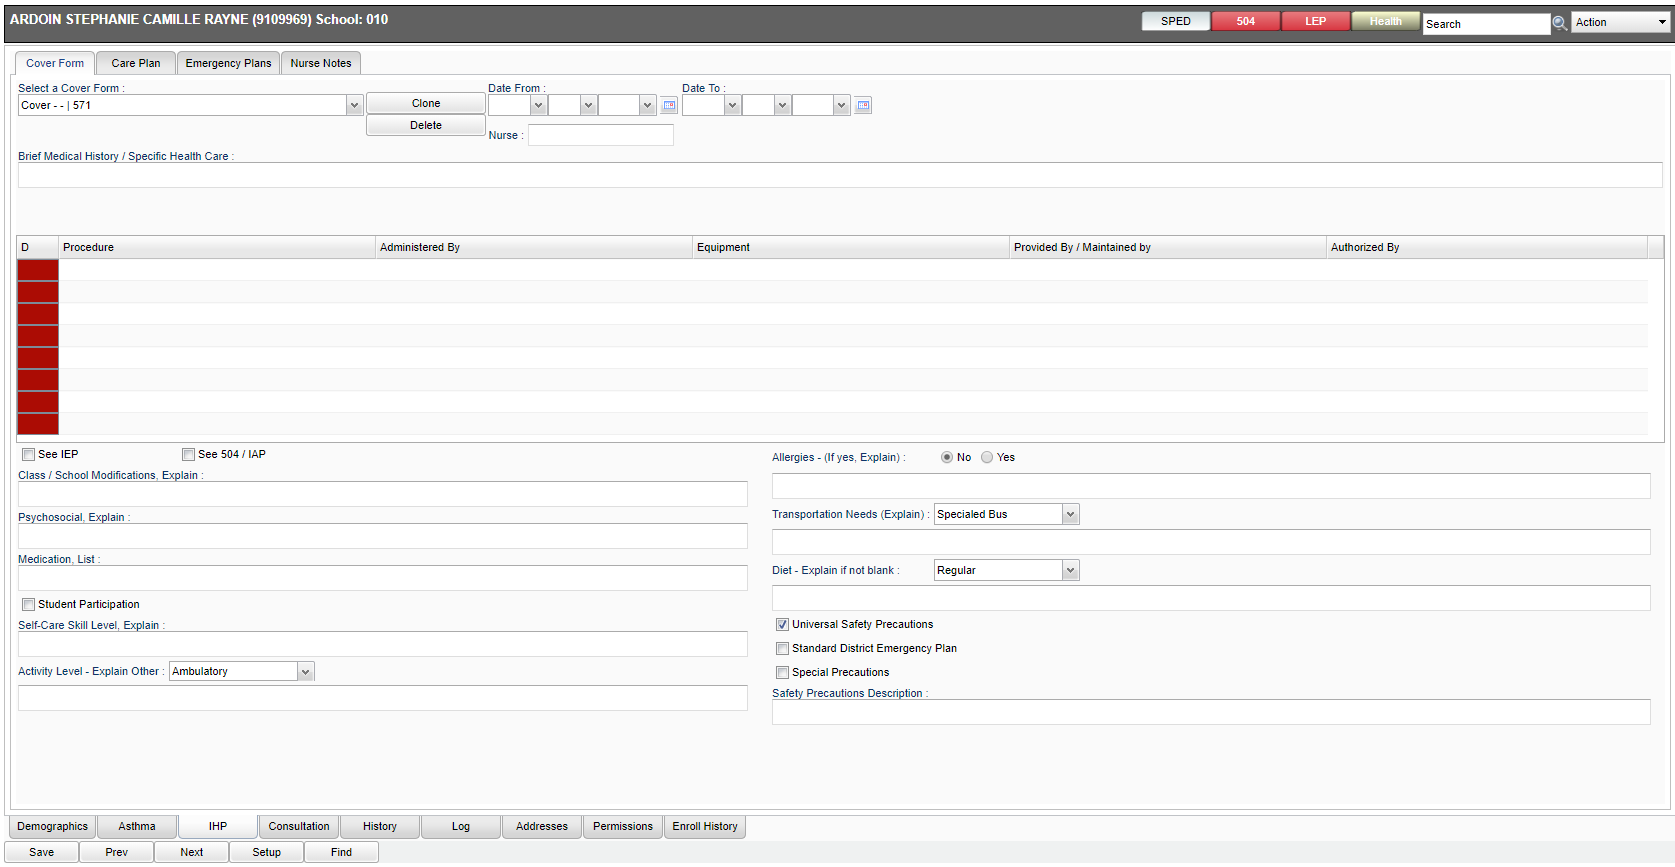
The "IHP Tab" leads you to the complete Individual Health Plan which includes the Cover Form, the Care Plan, and the Emergency Plan.
IHP - Cover Form
- Located at the top left of the IHP tab screen, this tab provides summary data on the nature of the Care Plan or Emergency Plan.
- Cover Form-Can be cloned by a nurse. The name will populate the nurse`s name that is logged into the system.
- Enter data in the various fields.
- Procedure
- Administered By
- Nurse/Advanced Practitioner
- TUP/UTSE/UAP
- Self with Supervision
- Self
- Equipment
- Provided By/Maintained By
- Authorized By
- Be sure to click Save when done to store the data.
IHP - Care Plan
- Located at the top of the IHP tab screen, this tab provides details of the care plan of the student.
- Create a New Care Plan: Start by clicking the “New” button, then complete the data fields. If the new care plan has not been completed click the In Revision checkbox and then click the Save button to mark the plan as being incomplete. If In Revision has been selected the words will appear in red. If it is complete click the Complete checkbox and then click the Save button.
- Edit an Existing Care Plan: Click the drop down arrow for Select a Plan. Select the desired care plan to edit. Edit the data fields. When done, click the Save button.
- Delete an Existing Care Plan: Click the drop down arrow for Select a Plan. Select the desired care plan to be deleted. Click the Delete button at the top, center of the Care Plan screen.
IHP - Emergency Plan
- Located at the top of the IHP tab screen, this tab provides details of the Emergency Plan of the student.
- Create an Emergency Plan - Select the “New” button. A list of conditions will be presented. Click on a condition to select.
- After selecting the condition, default emergency steps will be provided in the text field.
- The Emergency steps can either be edited and/or deleted and new information can also be inserted.
- If you have an electronic document already created, it can be copied from other software and pasted inside the WebPams screen.
- Be sure to click Save after entering, or editing any Emergency information.
- Delete an Emergency Plan - Click the Delete button located at the top of the Emergency Plan screen.
- Current Health Plans Only - Checking this box will allow the teachers to only view the Current Health Plan of the student.
- CCI Plan - Click the New button and select CCI Plan, the box will then be checked. When the user clicks on Print under the Action button, then the CCI Plan will now print instead of the Emergency Care Plan.
- Nurse - Name of School Nurse.
IHP - Nurse Notes
- Located at the top of the IHP tab screen, this tab provides an area for nurses to add additional information about the student`s information
- Click on Nurse Notes to open the blank screen. Once the information has been entered, make sure to save. This information can be seen by anyone that has securities to enter the Health System. It may also be printed by going to action in the top right of the screen and select print. A list of items to print is populated and then select nurse notes.
- Note - When notes have been added the tab at the top "Nurse Notes" will be in red.
- To print forms go the action button at the top right of screen. A box will pop up and it will give you the option to print a single IHP page or multiple IHP pages.
JCampus / Health / Health System / Tabs at the Bottom of the Health Screen


