Enroll a Student Using Re-Enroll
Video How-to
State Wide/Re-Enroll a Student video
How-to re-enroll a student previously enrolled
On the left navigation panel, select Student Master, Entry and Student Master.
Setup Box Options
To find definitions for standard setup values, follow this link: Standard Setup Options.
Other set up values not listed in the standard set up list:
- Find Only Active Students - Only currently enrolled students without a leave date.
OK - Click to continue.
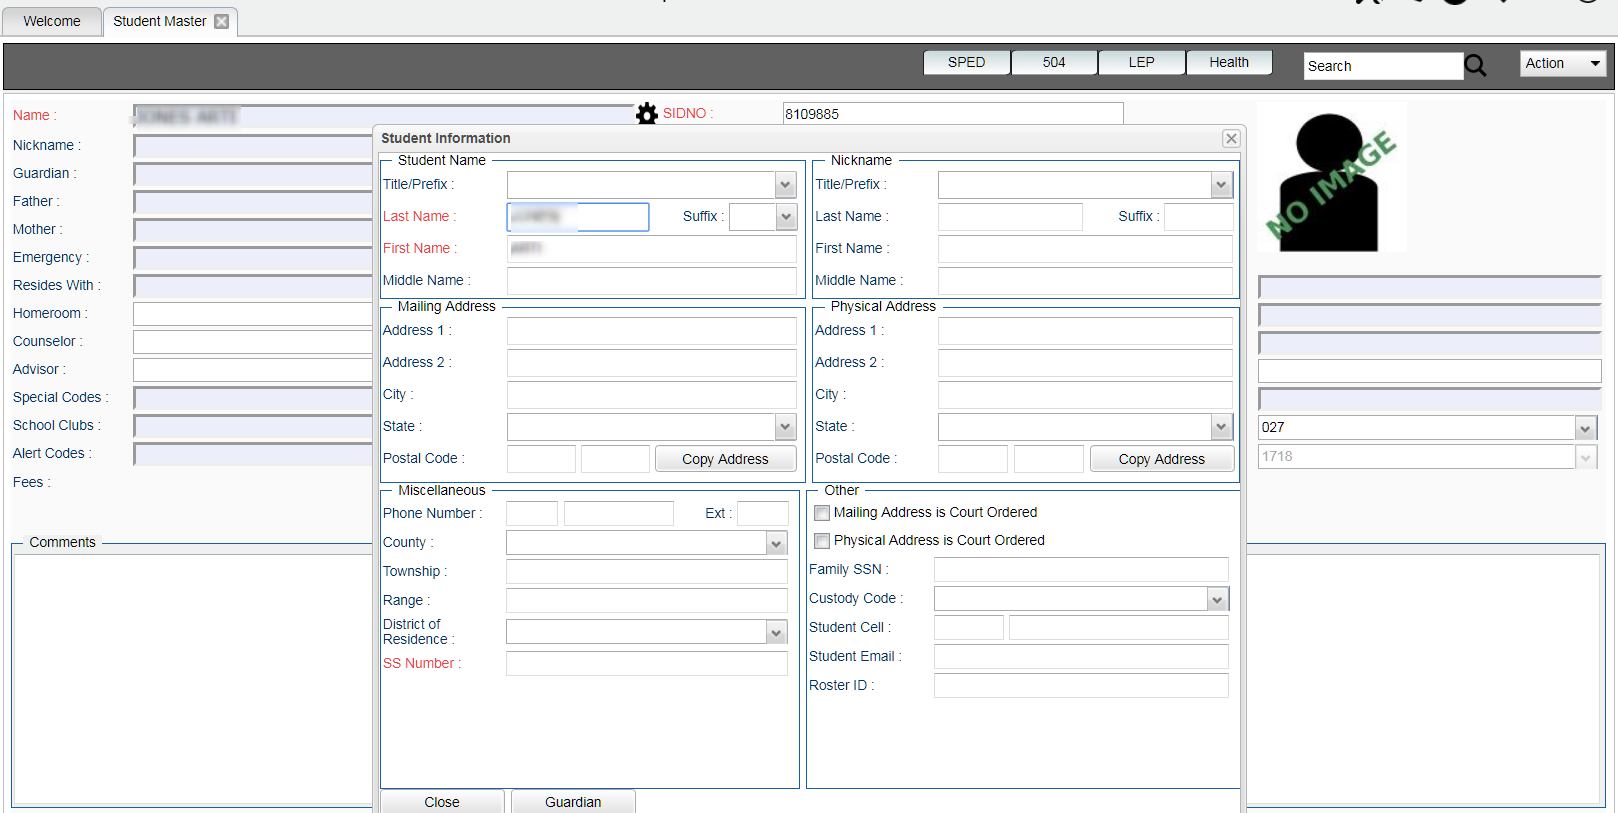
Click in the box to the right of Name and a Student Information box will appear.
Type in last name and first name of the student or the SSN. The Re-enroll will allow you to search for a student by SSN. Just type in all or part of the student`s SSN in the student information area. No name is required.
- If last or first name contains an apostrophe, use the key to the left of #1 on the keyboard.
- If the student's name is an uncommon name, try using the first two or three letters of the student's first and last name instead of the whole name.
Click Close
Click Action in the upper right of the screen.
Choose Re-Enroll
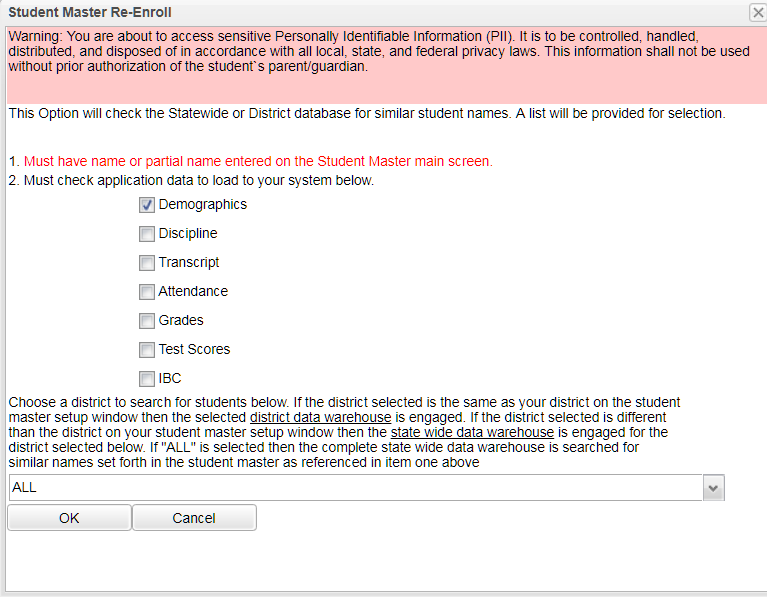
Check the appropriate items to import and load to your system.
- Demographic box is checked by default. This option will import the student`s demographic information. Such as name, SSN, birthdate, ethnic, gender, grade level as well as guardian, father, and mother information.
- Discipline - This option will import all of the student`s discipline referrals from the previous district.
- Transcript - This option will import the student`s high school transcript from the previous district.
- Attendance - This option will import all of the student`s attendance records from the previous district.
- Grades - This options will import the student`s current year grades from the previous district.
- Test Scores - This options will import all of the student`s standardized test scores (LEAP, EOC, ACT, etc.) from the previous district.
- IBC - This option will import all of the student`s scanned IBCs from the previous district. Document Archiving System (DAS) is required to use this new feature.
NOTE:
1) If you forget to check off some of the above items in your initial enrollment process, you can can go back through the enrollment process again. This time, just leave Demographic unchecked.
2)The Re-Enroll does not import Special Ed Information. Since that information is tied to jurisdiction records at the state, the student has to have a new jurisdiction record for your district, along with new services, before he can be imported from SER into JCampus.
3) If a student has a special code of SEA Seal Record, than that student will not be eligible statewide to show up as a re-enroll as long as they have the SEA code associated to them in that school year.
Choose the district from the drop down or, if unknown, choose ALL at the top.
Click OK
After clicking OK, the system will gather any possible matches. When the matches appear on the screen, choose the most recent entry for the current year.
Click on Import
A message will appear on the screen asking the user to 'Certify' that he/she has the permission of the parents to import the student's information into the user's school. The user MUST click Certify to enroll the student.
After clicking Certify, the system will ask for a school, entry code, new grade level, enrollment date and Transferred From.
- Select the appropriate school.
- Select the appropriate entry code.
- Change the grade level if needed. The pop up window will only show the grade levels associated with the school of which you are enrolling the student.
- The enrollment date will default to the current date. You may change the date at this time, if needed.
- The Transferred From school should default.
Click OK
Verify all information and click Save

