Permission Editor
This program will provide the user a way to create "Custom" permissions that are set on the Student Master permission tab. Teachers can edit from the iGear→Student→Custom Permissions.
Menu Location
System > Entry > Permission Editor
Setup Options

District - Default value is based on the user’s security settings. The user will be limited to their district only.
Type - Choose which area/type the permission applies to: student, attendance, discipline or grade
Show Published Only - Show only permissions marked published.
OK - Click to continue
To find definitions for standard setup values, follow this link: Standard Setup Options.
Main

Column Headers
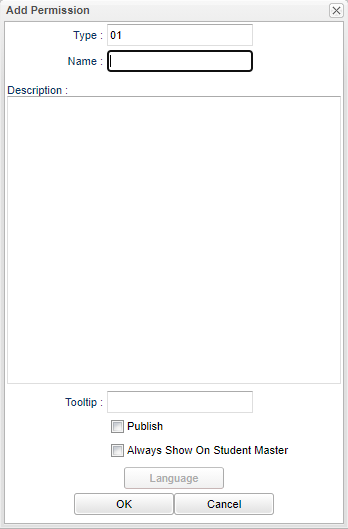
Type - Area/type of permission.
Name - Name of the permission.
Description - Description for this permission.
Tool Tip - Add the tool tip for this permission.
Language - Number of languages associated with this permission. Click on the number to see the different languages. Click on the row to see the verbiage.
Order - Adjust order to display permission.
Publish - Publish this permission.
Inactive - Set this permission inactive.
Always Show On Student Master - Check this box to always show on Student Master.
How-to
- Click on the row of permission and the defaulted language (English) Permission Editor box will appear.
- Click on Language button.
- Another create box will appear.
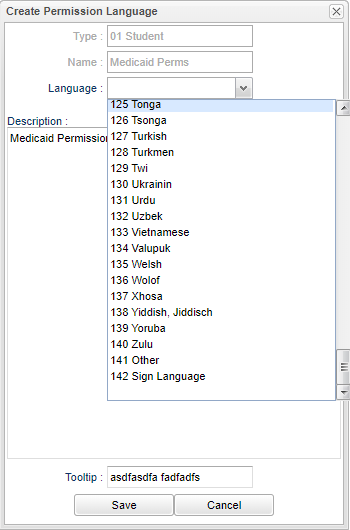
- Choose the new language from the drop down arrow.
- Type in the verbiage in the selected language as this is not a translator and then save.
- Click OK on the initial Permission Editor box.
- Now the language column, on that row, will display the new number of languages associated with this permission.


Bottom
![]()
Setup - Click to go back to the Setup box.
Print - This will allow the user to print the report.
Help - Click to view written instructions and/or videos.
Add - To add permissions, use the button at the bottom of the screen. Click on the rows at the top of the screen to edit existing permissions.