Difference between revisions of "Print to DAS"
From EDgearWiki
Jump to navigationJump to search| Line 10: | Line 10: | ||
#In the SPC there will be a "Documents" tab available on an individual student. The report card will be displayed in the "Official Documents" with the last run date. Note that only the last run report card is saved and displayed. | #In the SPC there will be a "Documents" tab available on an individual student. The report card will be displayed in the "Official Documents" with the last run date. Note that only the last run report card is saved and displayed. | ||
#*[[File:offdoc.png]] | #*[[File:offdoc.png]] | ||
| + | |||
| + | |||
| + | |||
| + | ---- | ||
| + | [[Report Card|'''Report Card''' Main Page]] | ||
| + | ---- | ||
| + | [[WebPams|'''JCampus''' Main Page]] | ||
Revision as of 13:00, 29 May 2020
For DAS users, the "official" report card can be displayed on the Student Progress Center.
To setup the new DAS report card SPC sharing mode, follow the steps below:
- Go to System>Entry>System Config. In the panel "Allow Print to DAS" click the "Report Cards" check box and then "Save".
- Next go to System>Entry>Communication Config. Click on the SPC Tab. On the lower left section "Document Archive Settings" click on "Share Documents" check box. This enables the DAS options. Click in the "DAS Autoprint" field and select "reportcards" and then "Save".
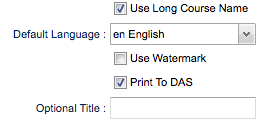
- Grades>List>Report Card. Setup your report cards as you normally would. There is a new option on the right hand side "Print to DAS". Click on the check box to have the individual student report cards saved for viewing in the SPC.
- In the SPC there will be a "Documents" tab available on an individual student. The report card will be displayed in the "Official Documents" with the last run date. Note that only the last run report card is saved and displayed.


