Difference between revisions of "Attendance Scanning"
From EDgearWiki
Jump to navigationJump to search (→How To) |
|||
| Line 21: | Line 21: | ||
#For '''Check Out Code''', '''Check In Code''', and '''Tardy Code''', select the default code for each. | #For '''Check Out Code''', '''Check In Code''', and '''Tardy Code''', select the default code for each. | ||
#Begin scanning or entering student IDs. As each ID is scanned or entered, the student will be marked with type and code selected and an attendance notice will automatically print. | #Begin scanning or entering student IDs. As each ID is scanned or entered, the student will be marked with type and code selected and an attendance notice will automatically print. | ||
| + | |||
| + | |||
| + | |||
| + | ---- | ||
| + | [[Post Attendance|'''Post Attendance''' Main Page]] | ||
| + | |||
| + | ---- | ||
| + | [[Attendance|'''Attendance''' Main Page]] | ||
| + | |||
| + | ---- | ||
| + | [[WebPams|'''JCampus''' Main Page]] | ||
Revision as of 04:02, 11 April 2018
This function will give the user the ability to scan student`s ID to check a student in or out or mark them as tardy to class.
How To
- Begin by setting Google Chrome to use Kiosk Printing.
- Login to JCampus with the kiosk printing shortcut.
- On the left navigation panel, click on Attendance.
- Under Entry, select Post Attendance.
- If you need instructions for setup values to be used, follow the link for Standard Setup Options.
- The next items are not found on the standard setup options document.
- 1st PD Code defaults to code 05 Doctor's note needed. To change the default code, click in the field to get a list of codes.
- Select the appropriate code as a default code.
- Check Auto Admit to have the system automatically print admit slips when checking a student out or checking a student in.
- Verify the number of minutes for Lunch and for Non-Instr Minutes.
- Click OK.
- 1st PD Code defaults to code 05 Doctor's note needed. To change the default code, click in the field to get a list of codes.
- Click Scan to open the Attendance Scanning window.
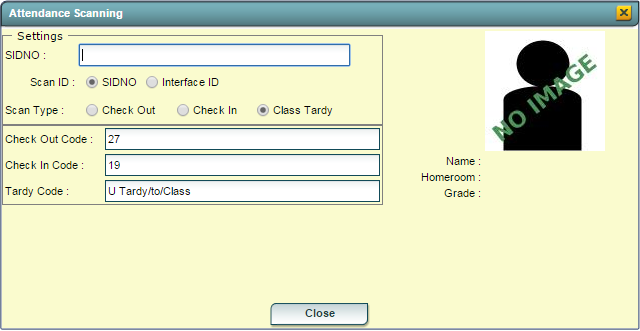
- For Scan ID, select whether to use the student`s ID (SIDNO) or Interface ID.
- For Scan Type, select whether the student is checking out, in, or is being marked tardy.
- For Check Out Code, Check In Code, and Tardy Code, select the default code for each.
- Begin scanning or entering student IDs. As each ID is scanned or entered, the student will be marked with type and code selected and an attendance notice will automatically print.
