Scheduling a Student
This section will show how to load requests and the multiple ways to schedule a student.
Loading Student Course Requests
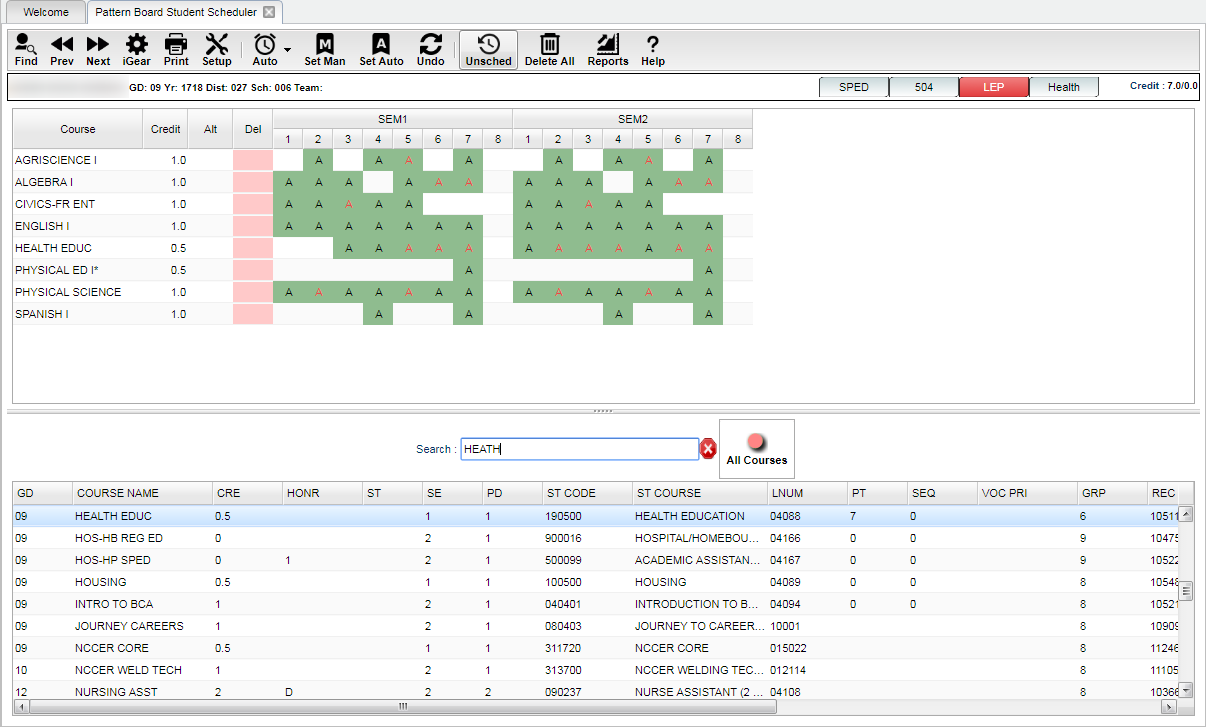
The course catalog at the bottom of the screen is used to load requests to the student panel by finding the desired course and clicking the course name. The course will then automatically load it to the student panel above. The user can navigate through the course catalog by using the search bar. The user may type all or partial search characters. The user may also set the column they wish to search by clicking that column header then type your search characters.
Interface
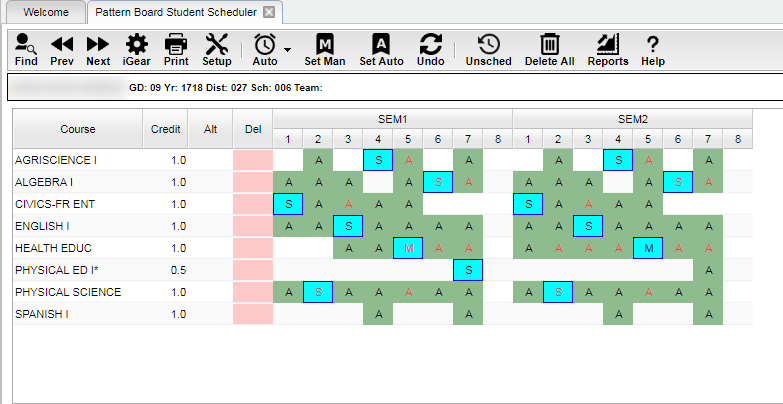
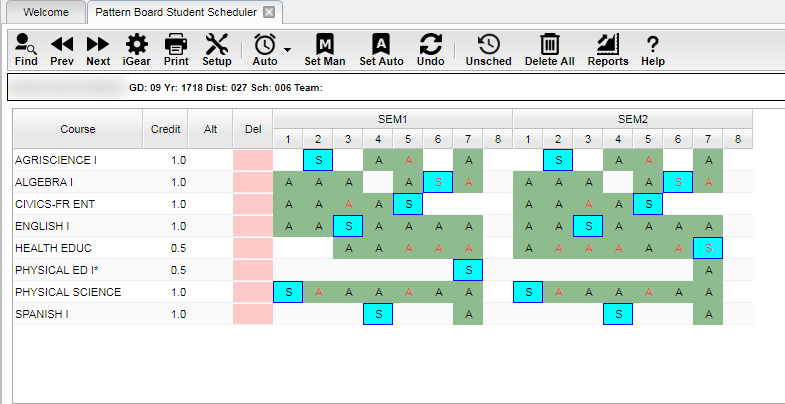
The Pattern Board Scheduler is designed to schedule one student at a time by providing the user with as much information as possible to assist in the process. The graphical presentation of the schedule allows the user to see all the possible conditions and scenarios. The Pattern Board also provides the user with detailed information concerning sections, teachers, and loads.
After a student`s requests are loaded, there a several graphic indicators to let the user see at a glance the status of a students schedule. This is accomplished with letters, colors, and borders.
- Letter Codes
- S - Scheduled Course.
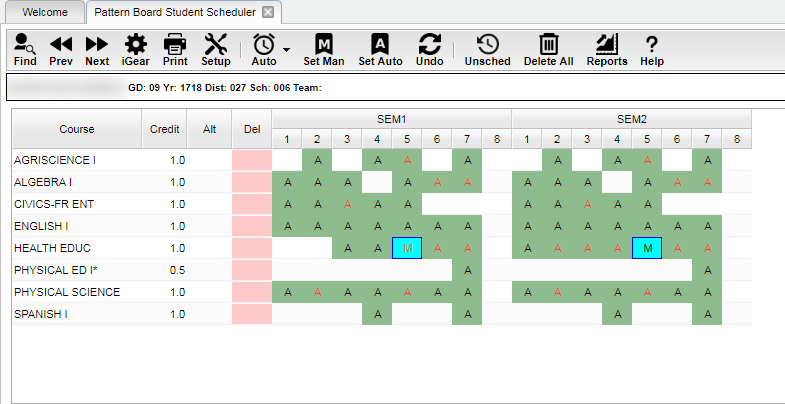
- M - Manually Scheduled Course.
- A - Available to be Scheduled.
- F - Full - Max Load has been met.
- Letter Colors
- Black - If the letter (S, M, A, F) is BLACK, then only one section is available in that time slot.
- Red - If the letter (S, M, A, F) is RED, then multiple sections are available in that time slot.
- Background Color Codes
- The information below is based on the default settings from the Color Setup utility found on the Pattern Board setup box. Both the colors and the values may be customized.
- Green - A green cell indicates up to 50% availability.
- Yellow - A yellow cell indicates 50-80% availability.
- Red - A red cell indicates 80 to 99% availability which also can be reviewed with a right click on the applicable cell. (The "F" indicates the max load has been reached or exceeded)
- Blue - A blue cell indicates the course has been scheduled.
Scheduling A Student
Manually Scheduling A Student
There are two ways to manually schedule a student. They are:
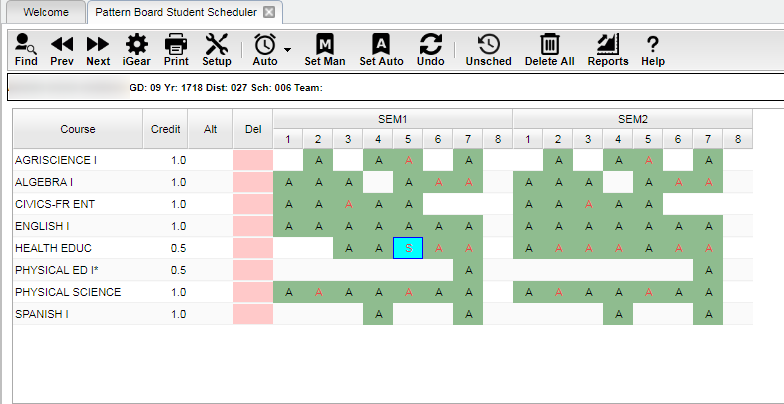
- Left Clicking On An A
- Select a course to schedule from the list of requests and then left click on an A in the desired semester and class period. The program will then schedule the student to the section that is available, changing the A to an S. If multiple sections are available during the selected semester and class period, the program will then try to find the class with the fewest students and schedule the student to that section.
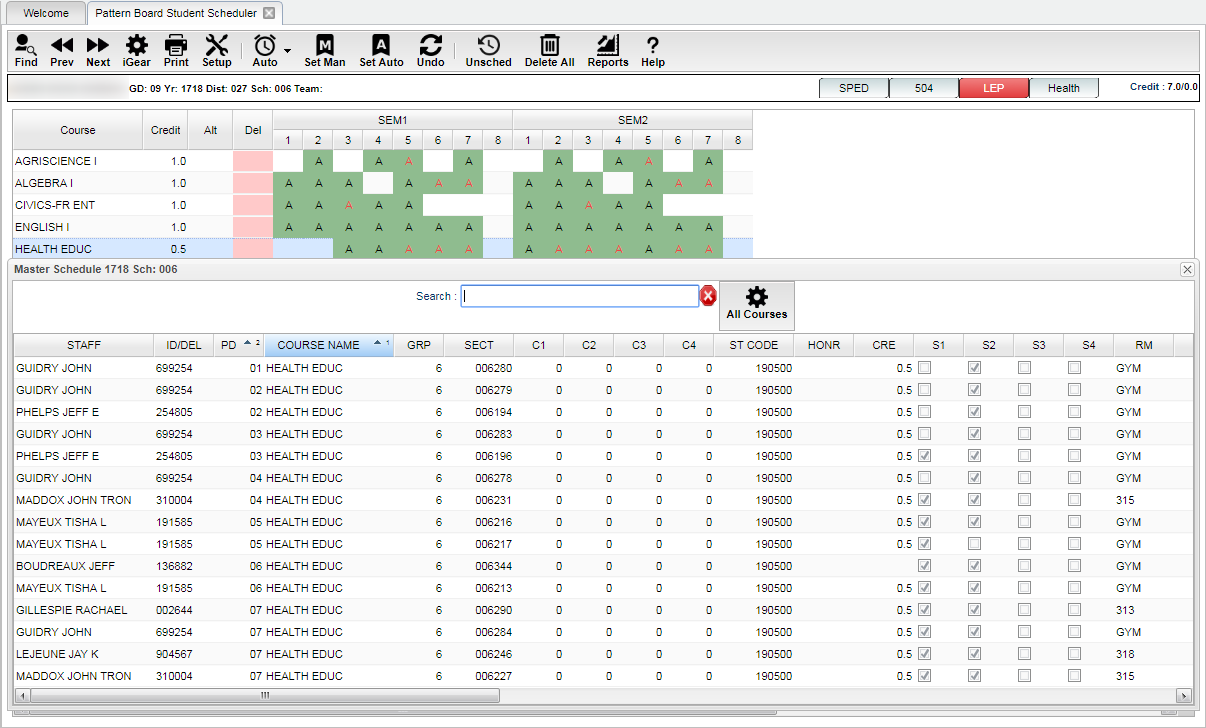
- Right Clicking On An A
- Select a course to schedule from the list of requests and then right click on an A in the desired semester and class period. The program will then display a master schedule listing all available sections for the course. Click on a section to schedule the student, changing the A to an M.
Automatically Scheduling A Student
There are two ways to automatically schedule a student. They are:
- Preserve Manually Scheduled
- By clicking Auto and then selecting Preserve Manually Scheduled, the program will review the student`s requests and scheduled courses. Any course that has an M will NOT be rescheduled. An course that has an A or S will be rescheduled. The program will try to find the best schedule for the student while working around any manually schedule courses.
- Reschedule All
- By clicking Auto and then selecting Reschedule All, the program will review the student`s requests and scheduled courses. The program will then reschedule all courses regardless of status and try to find the best schedule for the student.
