Out of Zone Loader
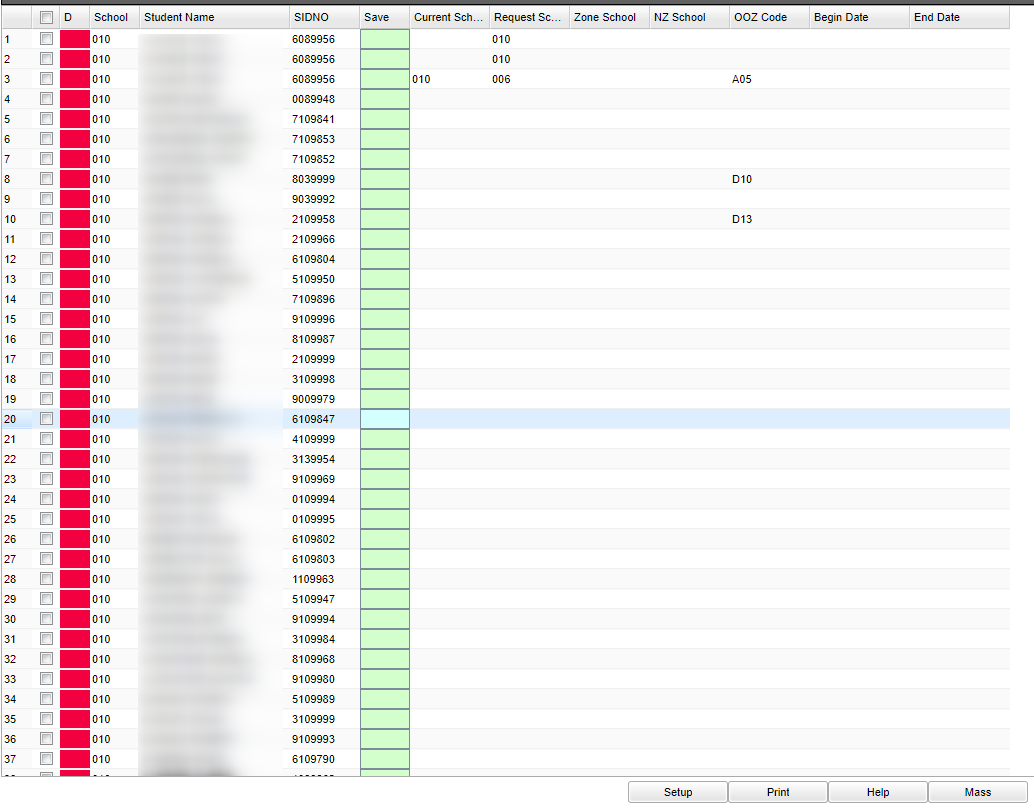
This Loader program will provide the user a way to load students that are attending a school that is out of their school zone. The report will display the current school, request school, zone school, the NZ school, OOZ code, begin date, and end date.
Menu Location
Student > Loaders > Out of Zone Loader
Setup Options
Year - Defaults to the current year. A prior year may be accessed by clicking in the field and making the appropriate selection from the drop down list.
District - Default value is based on the user's security settings. It will be limited to their district only.
School - Default value is based on the user's security settings. If the user is assigned to a school, the school default value will be their school site code.
As of Date - This choice will list only those students who are actively enrolled as of the date selected in the date field.
Match on Year - Matches year to prevent old/duplicate entries.
Filters
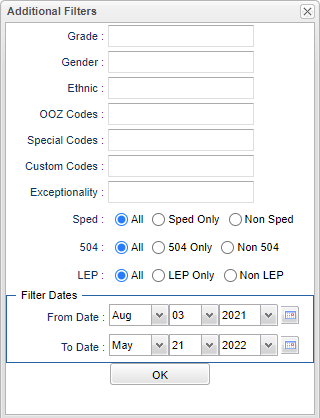
Grade - Leave blank or select all to include all grade levels. Otherwise, choose the desired grade.
Gender - Leave blank or select all to include both genders. Otherwise, choose the desired gender.
Custom Codes - Select the Custom Codes created in the Custom Code Management to filter the student list.
Ethnic - Leave blank or select all to include all ethnicities.
OOZ Codes - Click in the cell to choose codes if you are making a list of only specific codes if these codes were previously added. Otherwise, leave blank.
Special Codes - Leave blank if all special codes are to be included into the report. Otherwise, choose the desired special code.
Custom Codes - Select the Custom Codes created in the Custom Code Management to filter the student list.
Exceptionality - Click in the box to see a list of Primary Exceptionalities to choose from.
Sped:
All - Select this to show all students.
Sped Only - Select this to show Sped only students.
Non Sped - Select this to show Non Sped students
504:
All - Select this to show all students.
504 Only - Select this to show 504 only students.
Non 504 - Select this to show Non 504 students.
LEP:
All - Select this to show all students.
LEP Only - Select this to show LEP only students.
Non LEP - Select this to show Non LEP students.
Filter Dates
From Date - This date is for filtering students who have services on or after this date: From Date can be blank but the To Date must also be blank.
To Date - This date is for filtering students who have services on or after this date: To Date can be blank but the From Date must also be blank.
OK - Click to continue
Student duplicates are there so that new records can be generated in addition to a row that will already be there with previously loaded data.
In addition to the green Save column to save records, there is a red Delete column is Labeled D. Use this to delete Out of Zone records from the students.
To find definitions for standard setup values, follow this link: Standard Setup Options.
Main
Column Headers
Delete - Click to delete any information
School--Enrollment school number
Student Name - Student's full name
SIDNO - Student's identification number
Save--Click in the save cell after the information has been entered-SAVE each line individually.
Current School--School of enrollment at present
Request School--Requested school
Zone School--Zone of the enrollment present enrollment
NZ--Zone of the requested school
OOZ--Codes for acceptance of the transfer out of zone or denial of the transfer request.
Begin Date--Date of the approved transfer to begin.
End Date--Date of the approved transfer to end.
To find definitions of commonly used column headers, follow this link: Common Column Headers.
Bottom
Setup - Click to go back to the Setup box.
Print - This will allow the user to print the report.
Help - Click to view written instructions and/or videos.
Mass - To Mass Load, place a check by the students to which you want to mass load school information. Choose the school information and add a begin and end date. Click OK
and answer yes to the pop up question. The data will now be loaded.
To find the print instructions, follow this link: Standard Print Options.


