LA SIS Export File
This program will build the records for submitting student information to the state for any of the processing periods. The files that are created will be saved on JDrive. As part of the build process, the user will select a folder on JDrive for saving the file. Then download a copy of this file to your computer to where it is easily accessible. For assistance with the errors, go to SIS Error Help.
Menu Location
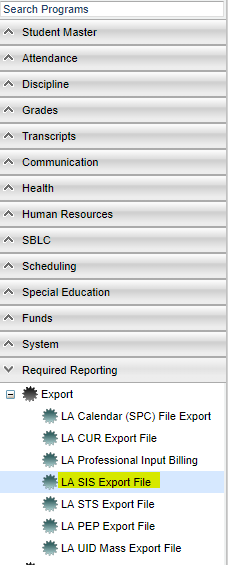
On the left navigation panel select Required Reporting > Export >LA SIS Export File.
Setup Options
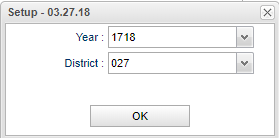
A small setup box will appear that has the Year and the District number. Verify this information and click the OK button.
File Tab
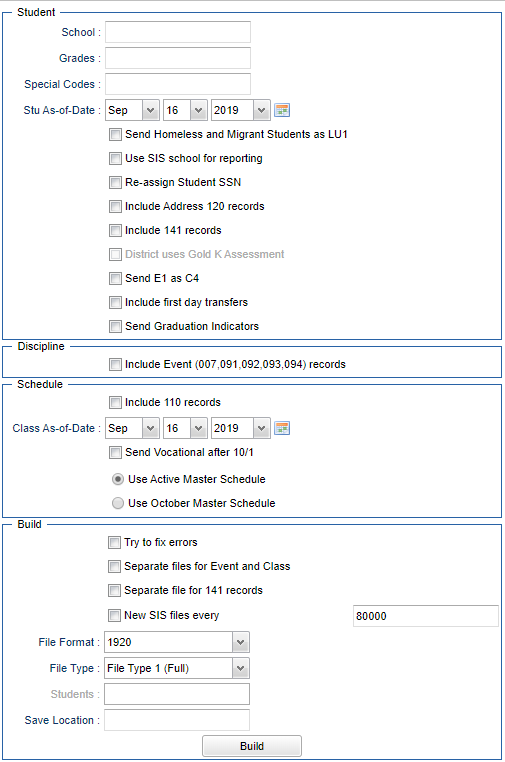
The next part of the setup will appear. It is divided into 4 sections: Student, Discipline, Schedule and Build.
Use the following instructions for each of these sections to complete the setup for building your SIS file.
Student Section
This section is for all processing periods.
School - Leave this field blank to send all schools or select the schools to include in the file.
Grades - Leave this field blank to send all grade levels or select the grade level of the students needed to be included in the file.
Special Codes - Leave blank if all special codes are to be included into the report. Otherwise, choose the desired special code.
Stu As-of-Date - Only the students with attendance records and/or discipline referrals, as of this date chosen, will be processed. This date is based on the processing period being submitted: Oct 1 (MFP or CLASS), Feb 1 MFP, or EOY (the last instructional day).
Check Box Selection - Be sure to always make the same selection(s) each time you run this program.
Send Homeless and Migrant Students as LU1 - If selected, students tagged as homeless or migrant will always be given Lunch Code LU1. All districts check this option.
Use SIS school for reporting - Check to use the SIS School instead of the enrollment school. Districts may have programs and/or special schools, that are not included in the Sponsor Site file at DOE, that identify students as being enrolled at other schools in the district at DOE. This school is called the students' SIS school. If you have this situation in your district then you must check this item.
Re-assign Student SSN - (No longer used) Check if the SSN of one of more students have changed since the last processing period.
Include Address 120 Records - Check for all processing periods but only for Type 2 Charter schools/districts and OJJ (Office of Juvenile Justice). They are required to include the address records for students. All other districts must leave this item unchecked.
Include 141 records - For Oct 1 MFP processing period only, check to include the Literacy Screening and DRDP Assessment record.
- Note: Create record 141 record type if the year is 1920 or higher. Create record 140 type record if the year is 1918 or lower.
District uses Gold K Assessment - This becomes active only if Include 140 records is chosen. The district uses Gold K assessment so the program sends exception code 4 for DRDP on the 140 record.
Send E1 as C4 - You MUST check this item if your district number has been changed by DOE from the previous year's number.
Include First Day Transfers - Check for students who transferred to another school within the same district on the first day of school. This will include the records from the original school. NOTE: Only necessary if the "Try to Fix Errors" box is checked.
Send Graduation Indicators - This selection was added in July of 2018 due to changes at LDOE regarding when graduation information can be sent. This sends the graduation date for seniors who do not have a retention code. Always check this when submitting seniors.
Discipline Section
This section is for all processing periods.
Include Event Records (007, 091, 092, 093, 094) - Check to create the SIS Event file for Discipline records. Check for all processing periods.
Schedule Section
This section is used for the Oct 1 Class (not MFP) processing period ONLY.
Include 110 records - Check to include schedule records in the SIS file that is being built.
Classes as of date - Includes students enrolled in classes that began as of the date selected. Use Oct 1 when it is on a weekday. Use Sept 30 when Oct 1 is on Saturday. Use Oct 2 when Oct 1 is on Sunday.
Send Vocational after 10/1 - Check to process students active in vocational classes that started after 10/1. This setting overrides the "As of Date" for vocational records. Making this selection will have a positive effect on your vocational dollars.
Use Active Master Schedule - Choose whether to use your district's current Master Schedule or your district's Master Schedule as of the most recent occurrence of 10/1 for processing. NOTE: The selected option must also be used for CUR and PEP reporting.
Use October Master Schedule - Choose whether to use your district's current Master Schedule or your district's Master Schedule as of the most recent occurrence of 10/1 for processing.
- NOTE: The selected option must also be used for CUR and PEP reporting.
Build Section
Try To Fix Errors - Check to update the generated SIS files to correct for common errors in SIS. Entry code and date errors, etc. Any student that was with a district the previous year (as reported in SIS EOY) will be sent with a E1 code with the "fix errors" option.
Separate Files for Event and Class - Check to create separate files for discipline record types 007, 091, 092, 093, 094 (event records) and 110 (schedule records). This is NOT usually selected.
Seperate File for 141 Records - For use during the Oct 1 MFP processing period; choose to create a file for 141 records separate from the SIS file (above).
New SIS files every ... - Choose the maximum row count of a single SIS file. If more rows exist, they will be added to a new SIS file. This is mainly used for large districts.
- NOTE - Be sure to submit all of these files that are built when downloading the files to your computer.
File Format - Choose which year's SIS file layout to export.
File Type: Select either File Type 1 (Full) or File Type 2 (Partial).
File Type 1 (Full) - This selection can be the district, a single school or multiple schools, with one or more grades for the district or for the schools selected.
File Type 2 (Partial) - This selection can be used for selecting individual students. This selection results in a Student field to become active. Select one or more student(s) from the student list popup. You can search for students using the search field at the top of the student list. You can sort by ID number(s) or by name.
Students - Select which students will be processed. (Only for use with file Type 2 (partial))
Save Location: When you click in the field, jDrive will open. Any previously created folders and/or documents will be displayed. If you do not have a SIS folder, click the folder with the plus sign in the upper left corner of the jDrive display to create a new folder. A popup will appear in which you will enter the name of the SIS folder. The simple name SIS is sufficient. Click OK. Double click the folder. The folder name is entered into the field at the bottom left of the popup. The selected folder name will be entered into the field at the bottom left of the screen. Click Choose.
Click the Build button at the bottom of the setup box. The user will receive two messages about this particular process:
- The number of students whose records will be built
- A reminder that you can view the status of the build process and that you will receive an email when the program has finished
While the file is processing, progress can be monitored by clicking the TASK STATUS button at the bottom of the window.
There are two tabs on the Task Status window--Current and Completed
The Current tab will automatically refresh, giving you information about the processing.
Pending--This status indicates that the file is waiting to process.
Start--This status indicates that the file is gathering the records to process.
Running--This status indicates that the file is processing. There will be a progress bar and a Report: current date/clock time
After the file has finished processing, the Current tab screen will be blank.
The Completed tab will display four columns of information about the files that have been built.
siLASISlogic x.xx.xx--this is the program name that is being used with the version (x.xx.xx) number of the program.
Completed progress bar--this shows the number of records processed
Status--the status will always be Finish
Report:date/time--This information will be used to identify which file(s) you must use when submitting SIS to the Leads Portal.
The Completed tab is where you access the errors that are found during the SIS build process.
Click on the status line to get the Error popup.
If you have requested only a few of your schools, the error report will include errors from all schools.
At the bottom of the error list popup there is a check box to print errors by school. You can then select to print only the pages for the small group of schools that you are focusing on.
After the file has been processed, you must save a copy of the jDrive file(s) to a location on your computer.
Open the jDrive by clicking on the Cloud icon on the top right of the JCampus screen.
Navigate to the file(s) that you created.
Right click on the file and click Download.
A preview of the file will appear on your screen in the upper left corner.
Right click on the preview and select Save As.
Navigate to the location where you want to save these files. There will be a file name in this popup; if you have created multiple files be sure to change it to a unique name.
Repeat this for the remaining SIS files.
Be sure to download the Event file.
After downloading the SIS and Event files, you are ready to submit them to DOE.
Student Tab
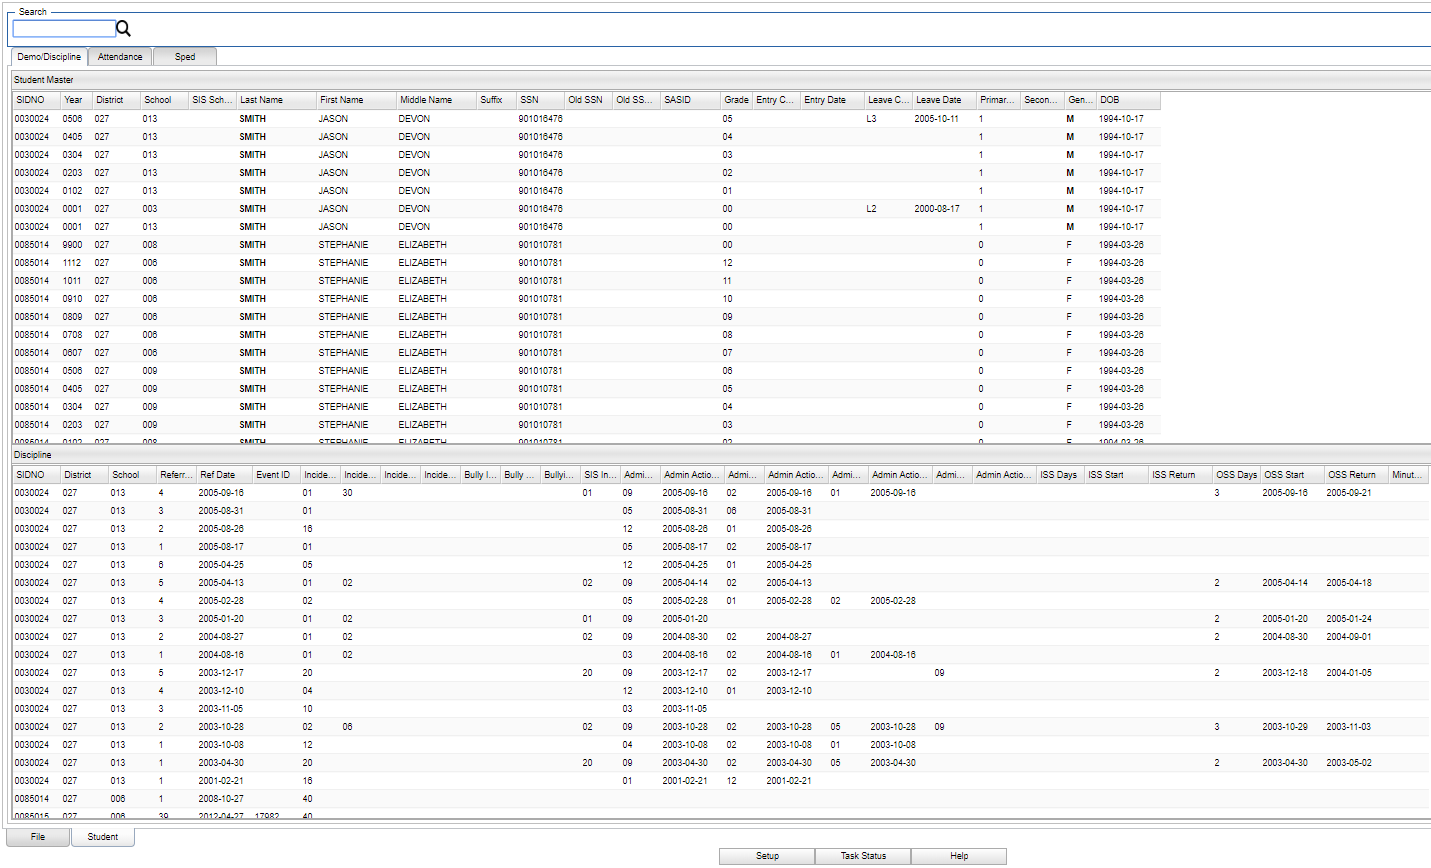
This is for the student lookup function for SIS build which is the old "My SIS" from JPAMS:
- The user does not have to build a file to have access to either of the Student or File tabs.
- Use the Search field to look for the student whose data needs to be reviewed.
- There is one major difference from the JPAMS version though. The information on this display can not be edited so the Student Master and the Discipline programs will have to used for editing purposes.
Demo/Discipline
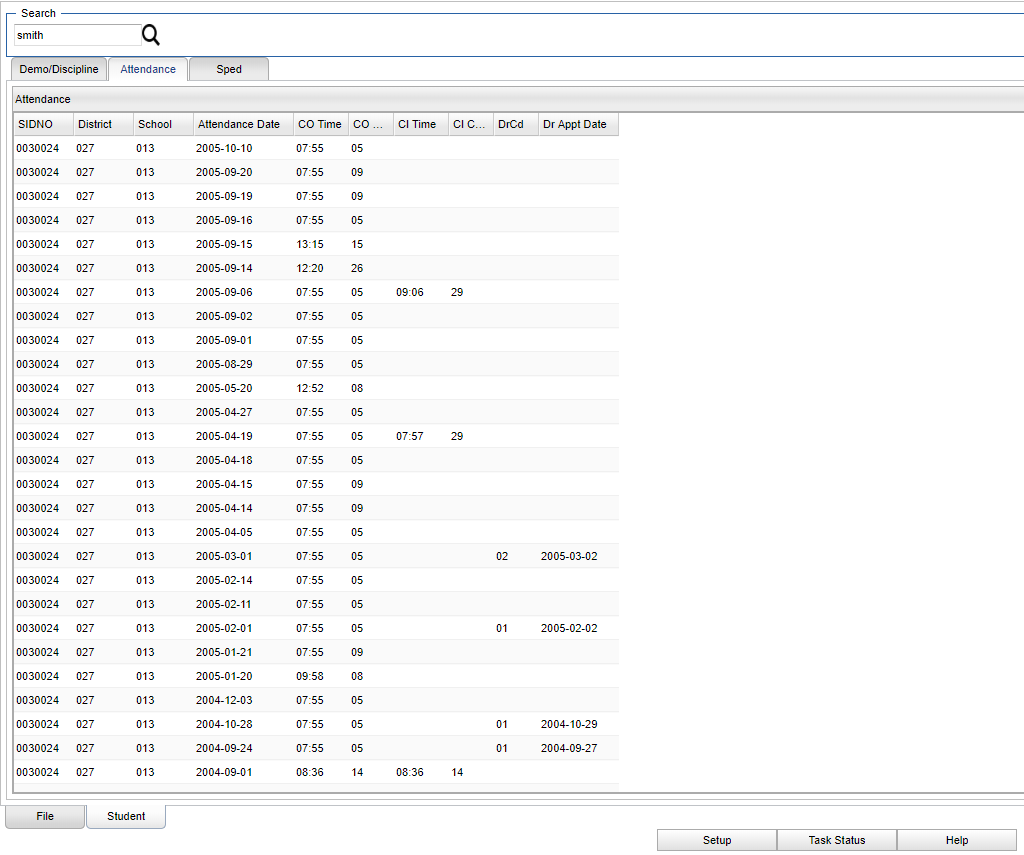
Attendance
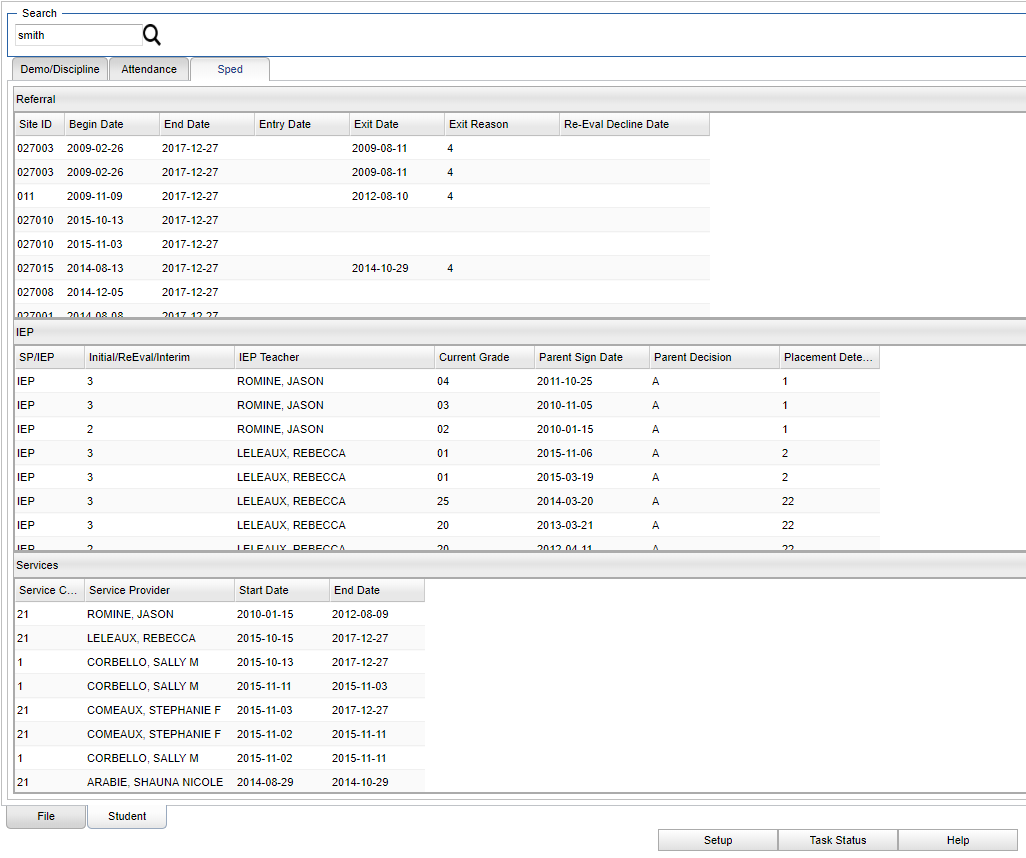
SPED
Bottom
Setup - Click to go back to the Setup box.
Task Status - Click here to check the status of the task.
Help - Click to view written instructions and/or videos.
Q & A
Q: I thought all our graduates used the last day of school, because it coincided with SIS and SPC (calendar). So, is there supposed to be different graduation dates in STS and SIS?
A: Yes, these two dates are different. The graduation date in STS is the date the student walks across the 'stage' to get their diploma as specified in the Calendar Editor. The SIS date is a program completer date which is the last day of school. Just remember in SIS, graduates are to be exited last day of school, not graduation date.
Q - When should summer graduates be exited?
A - Summer graduates in SIS can be exited on the first day of school in the next school year and in STS they can be exited last day of school in the current school year.
