Delete Log List
This program will provide a list from programs that have had a record deleted, by the person that deleted it, the reason, and date deleted. Also see the Audit Review Report for similar information.
Menu Location
System > Reports > Delete Log List
Setup Options
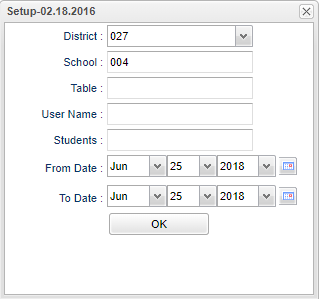
District - Default value is based on the user’s security settings. The user will be limited to their district only.
School - Default value is based on the user’s security settings. If the user is assigned to a school, the school default value will be their school site code.
Table - This is the program table areas that need to be checked for deletions. Ex: Use Resource for the program Master Schedule Editor to see section numbers deleted. Leave blank to check all program areas.
User Name - The user who has deleted the record. Choosing this will allow the user to pick a staff name and see what deletions they have made.
Students - If known, choose the student affected. If not, leave blank.
From Date and To Date - A set of dates that limits the selection of records for the report to a beginning date (from) and an ending date (to) range.
OK - Click to continue.
To find definitions for standard setup values, follow this link: Standard Setup Options.
Main
Column Headers
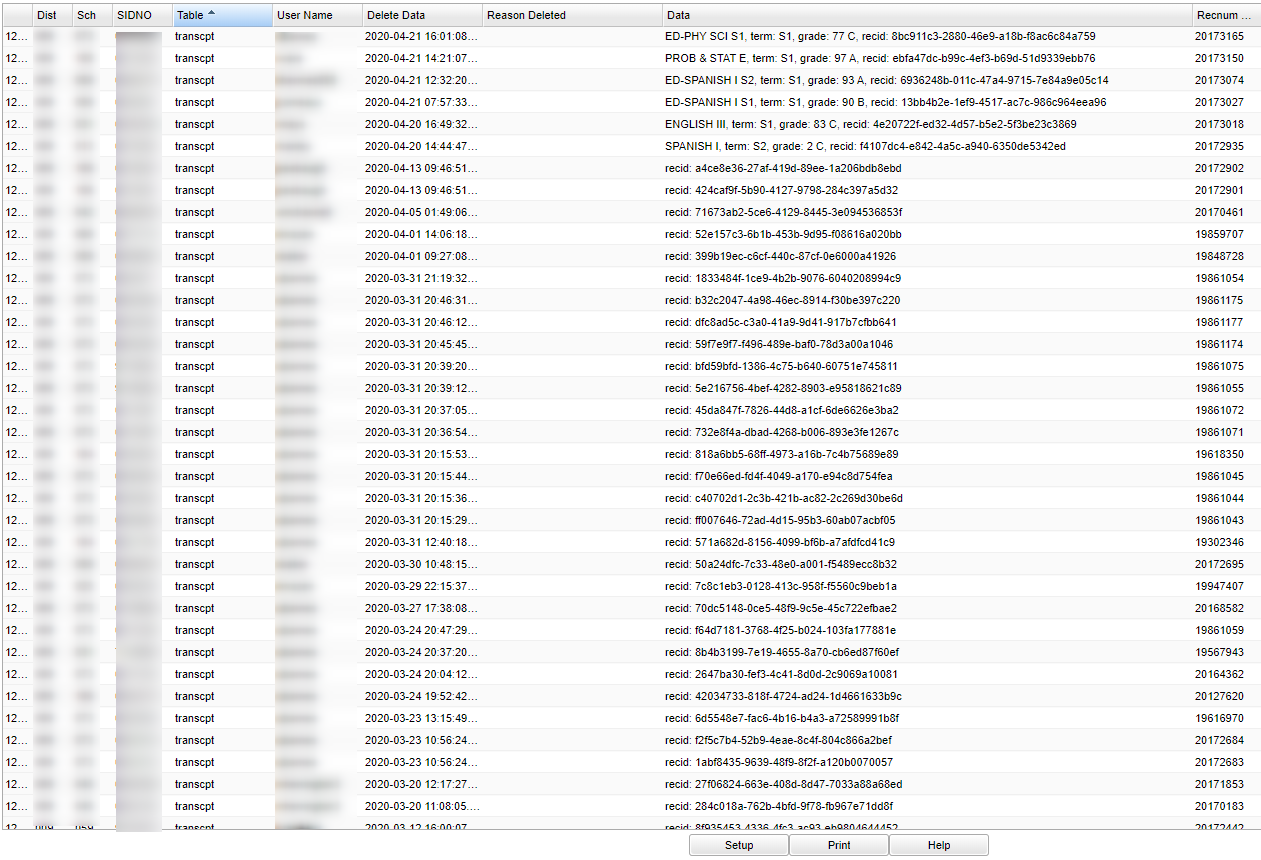
Dist - School district
SCH - School for the report
SIDNO - Student Identification Number
Table - Data that was deleted - Database Table where the deletion occurred Ex: If there was a section deleted in the Master Schedule Editor, it would show the section number.
User Name - User ID of the person that deleted the data.
Delete Date - Date of deletion.
Reason Deleted - The reason the user entered for the deletion.
Data - The data the user deleted from the record, including Semester/Final and Course and Grade.
Recnum - Record number of the deleted data
To find definitions of commonly used column headers, follow this link: Common Column Headers.
Bottom
Setup - Click to go back to the Setup box.
Print - This will allow the user to print the report.
HELP - Click to view written instructions and/or videos.
By highlighting rows within the list and then clicking print, the rows highlighted will be the only rows printed. To undo a highlight, press and hold down the Control key while clicking back on the highlighted area/row.

