Assign a Bell Schedule to a Single/Multiple Students
From EDgearWiki
Jump to navigationJump to searchVideo How-to
Assigning Bell Schedules video
How to Assign a Bell Schedule to a Single Student
- Open the Student Master record of the student.
- Click on the School ID field. A School Information window will appear. Click on the Bell Name field.
- A Select Bell to Use window will appear showing the bell schedules created for the school. Click in the select box of the desired bell schedule, then click the OK button.
How to Assign a Bell Schedule to Multiple Students at Once
- On the left navigation pane, click Student Master, then Loaders, then Bell Schedule Loader.
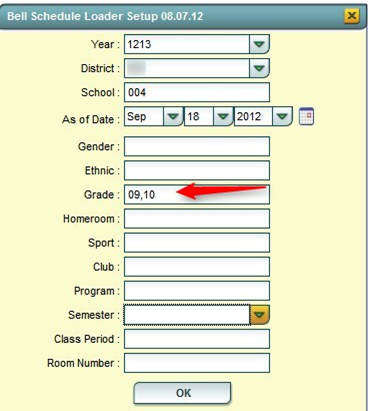
- At the setup box, set the Year, School, and As of Date.
- To assign a bell schedule by grade level of students, set the Grade(s) of the students to be assigned. Click the OK button.
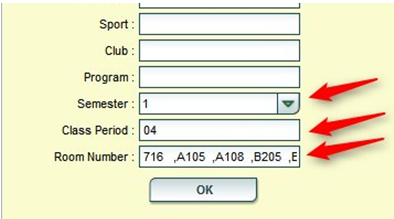
- To assign a bell schedule by room(s) in a master schedule, enter the Semester, Class Period, and Room Number(s) fields to assign which students in given rooms will be assigned the bell schedule. Click the OK button.
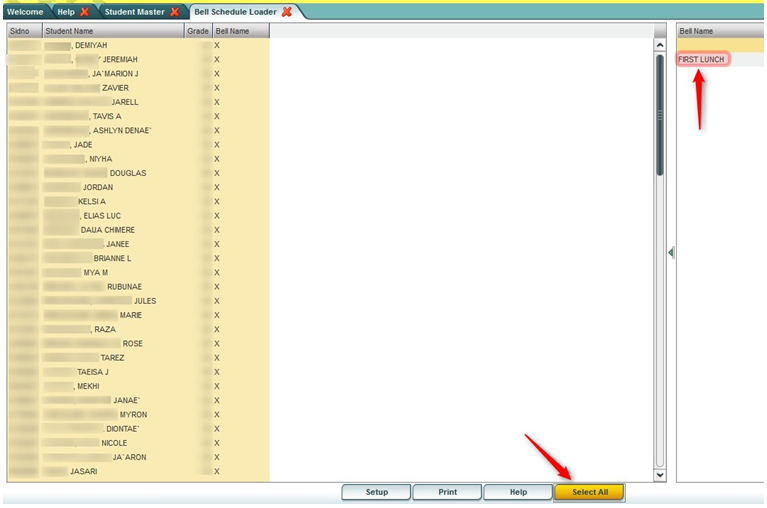
- A listing of students will appear on the left. A listing of bell schedules created for the school will appear on the right. Click the Select All button on the lower right. This will place an “x” marker by each student in the listing.
- Click the desired bell schedule on the right. All students with an “x” will be assigned the bell schedule. The user will see, after updating, that next to each student’s name is the bell schedule name assigned.
- To change the bell schedule, click in the Bell Name field to place an “x”, then select the desired bell schedule on the right.
Bell Schedule Maintenance Main Page


