Add New Medication
From EDgearWiki
The steps below go over how to add new prescription medication to a student.
Getting Started
- On the left navigation panel, click Health, then under Entry, click Medication.
Setup Options
- Year: Select the school year.
- District: This will default to the district's number based on the login of the user.
- School: This will default to the school associated with the user. If the user is associated with multiple sites, other school sites can be selected.
- Show: By default, the selection of Active Prescriptions is displayed, which filters out prescriptions no longer in effect.
- To see all prescriptions, whether active or inactive, select All Prescriptions.
- Click the Ok button to begin the Medication program.
Add New Medication
- On the Medication screen, click the Add New button. An entry screen will appear to enter the medication details.
- Fields labeled in a red color are required in order to save the medication information to the student.
- Student: Click to select the student.
- Medication: Click to select a medication previously entered. If a new medication, click the New button and enter the medication.
- Doctor: Click to select a doctor. If a new doctor, click the New button to add the doctor's information.
- Dr. Phone: Phone information will be displayed. To change the phone number, click in the cell and enter / edit the phone number.
- Date Prescribed: Enter the date of the prescription.
- Route: Select where the medication is to be given (ie... mouth, topical, ear, ...)
- Drug Type: Select the type of medication (ie... Tablet, drops, capsule...)
- Schedule Type: The default setting is Single. For Multiple dosage directions, see section below, Entering Multiple Dosage Medication.
- Administer Qty: Enter the amount of medication to be administered.
- Dosage: Enter the dosage amount, then select the unit (Ex. mg, cc, puff, ...)
- Day of Week: Select day(s) of the week that medication is to be given.
- Begin Date: Date medication is to start.
- Time of Day: The default is As Needed (PRN). To change this default, follow the directions below:
- Click in the Time of Day field. A Edit Time of Day box will appear.
- Click anywhere in the white space. A Time of Day selection box will be displayed.
- Uncheck the As Needed selection, then click on the desired time, then click the Ok button.
- You will be returned to the Edit Time of Day box. Click Ok to complete the Time of Day edit.
- The Time of Day field should now show the selected time of day.
- End Date: Date medication is to stop.
- Desired Effects: If needed, enter the desired effects of the medication in the Desired Effects text box.
- Adverse Effects: Enter any adverse effects of the medication in the Adverse Effects text box.
- Special Instr: Enter any special instructions in the Special Instr text box.
- Logging Nurse: Default is the user name associated with the login. Click to change nurse if needed.
- Witnessed By: Default is the user name associated with the login. Click to change nurse if needed.
- Receiving Nurse: Default is the user name associated with the login. Click to change nurse if needed.
- Received From: Click to enter name of parent / guardian providing medication.
- Rx Number: Click to enter the Rx number of the prescription.
- Quantity Received: Enter the amount received from the parent/guardian.
- Add Consultation: Selecting this option will automatically post a Consultation record in the student's Health System record.
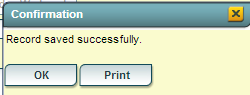
- Click the OK button to save the new medication. A confirmation dialog of "Record saved successfully" will appear.
- Click Print to print a Medication Receipt for the parent/guardian to sign.
- Click OK to close the Add New screen and return to the main Medication screen.
- Clicking Cancel will close the Add New Medication screen and return the user back to the main Medication screen.
- Warning: Clicking Cancel will result in any data on screen to be lost.

Entering Multiple Dosage Medication
NOTE: The flow for multiple dosages of medication is to (1)enter and save the prescription with details for the first medicine administration of the day, (2) Re-open the Prescription to add additional medicine administration(s) for later in the day.
- The reason for the re-opening of the Prescription is that an initial storage of the Prescription is needed before additional medication administration details can be added to it.
- Enter the Student, Medication, Doctor, Date Prescribed, Route, and Drug Type as detailed in the section above.
- At the Schedule Type selection, click the radio button for Multiple.
- The screen will change to display row entry information such as Start Date, End Date, Time, etc...
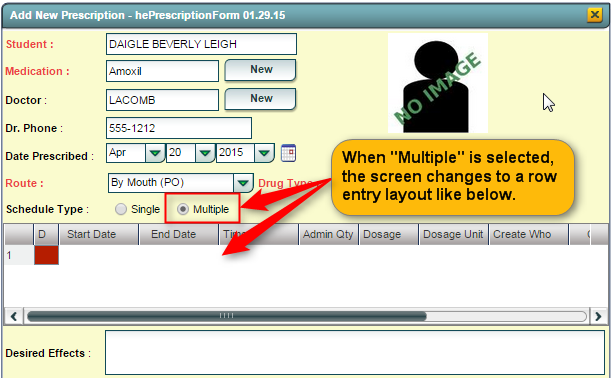
- Click in the Start Date cell on the first row. Enter the date the first medication administration is to begin. Click in the End Date cell to enter the date the dosage is to stop.
- Click in the Time cell and select the time for first medication administration.
- Click in the the Admin Qty (Administration Quantity), and enter the quantity for the first medication administration. (Ex. 1, 2, 3...)
- Click in the Dosage cell and enter the Dosage to be given for the first medication administration. (Ex. 1, 2, 5, 10, 15, 20...)
- Click in the Dosage Unit cell and select the unit measurement for the first medication administration. (Ex. ml, mg, cc, tsp, puff...)

- As in the previous section, enter the Desired Effects, Adverse Effects, Special Instr, Logging Nurse, etc...
- Click the OK button to save the new medication and return to the main Medication screen.
- On the Medication screen, you will see a new Prescription for the student, but it only contains information for the first medication administration.
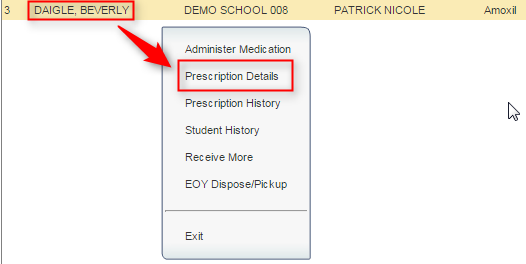
- To add the second medication administration detail, click on the student's name. A menu will appear. Select Prescription Details.
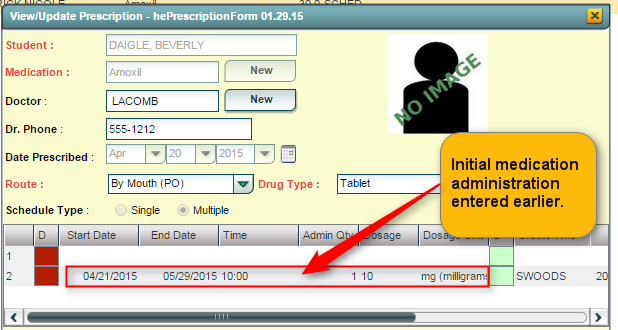
- The Prescription details originally created will appear. Note that under Schedule Type, the details entered earlier for first medication administration are present as shown below.
- To add a second time/dosage of medication administration, click in the Start Date cell of the FIRST ROW of information, and enter Start Date of the second medication administration (usually same as the first administration start date).
- As before, move from left to right of the FIRST ROW, filling in the detail cells End Date, Time, Admin Qty, Dosage, etc....
- Note: The Admin Qty can be different than the first administration. (Ex... The morning dose is 1 tsp, the afternoon dose is 2 tsp).
- Click the green Save cell at the end of the first row. This will store the additional medication administration on the prescription.
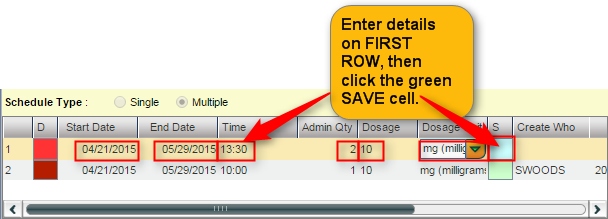
- If a third medication administration detail is needed, just remember to fill in details on the FIRST ROW, then click the green Save cell at the end of the row.
- To close the screen, click the Ok button at the bottom of the screen, then click the Ok button again.


