LA EDLink Reporting
This program will build the records for submitting student and teacher information to the state.
Menu
On the left navigation panel, select Required Reporting > Export > LA EDLink Reporting.
Things to check beforehand:
- Make sure your firewall allows TCP port 22 from the JCampus DB server to 13.65.236.122 (not needed for Hosted users).
- Make sure your JCampus external IP address is whitelisted with the state (not needed for Hosted users).
- Make sure you have your EDLink SFTP password to enter and not the Dashboard password as they are different.
Setup Options
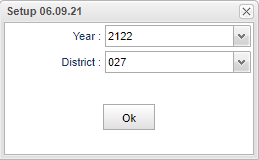
Year - Defaults to the current year. A prior year may be accessed by clicking in the field and making the appropriate selection from the drop down list.
District - Default value is based on the user's security settings. It will be limited to the user's district only.
Schedule Main
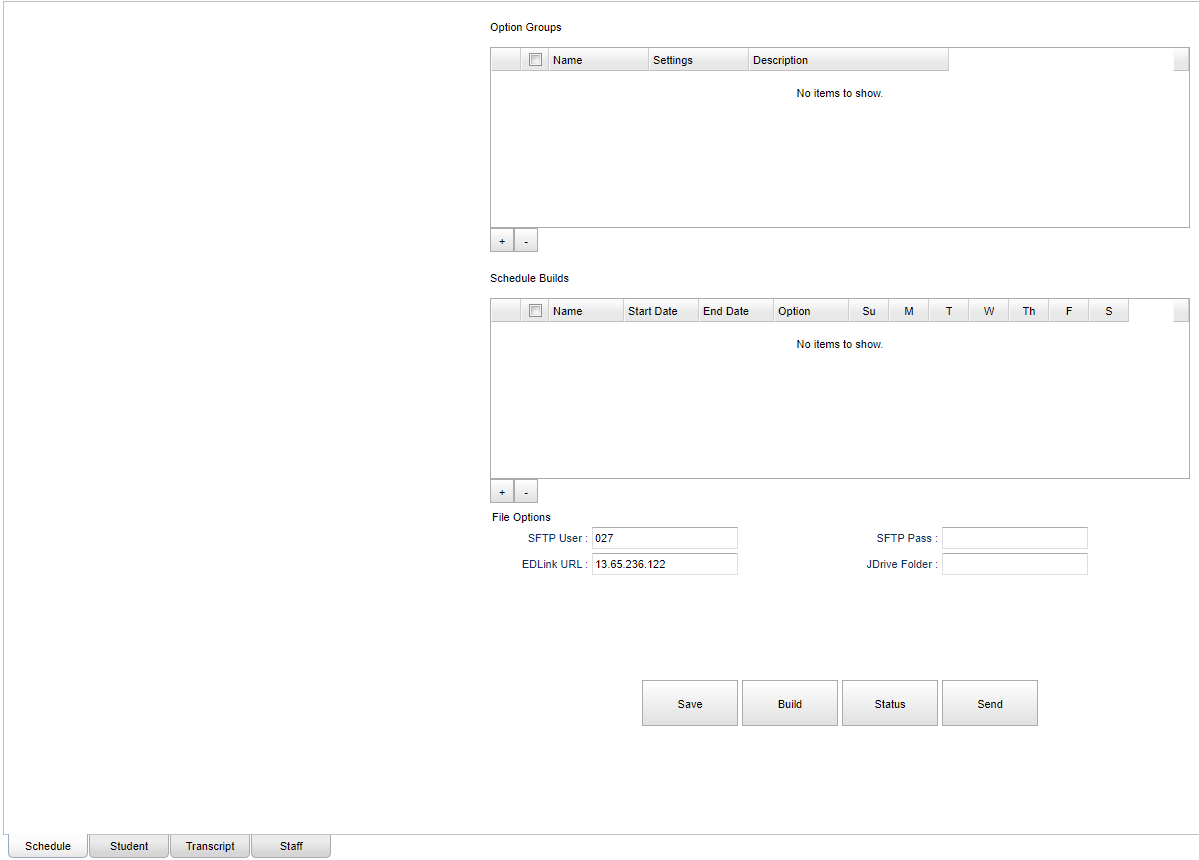
Create "Option Groups" and "Schedule Builds"
- Option Groups are simply a way of organizing settings with a name.
- Click the "+" under the options group table.
- Enter a name a description.
- Click "Save"
- Click on the "-" for deleting after having chosen the option that needs to be deleted.
- Choose a schedule using the days of the week for automatic files to be built and sent.
Add SFTP Settings
- SFTP User - This is the user name to access the SFTP server. This should be already defaulted as setup by the IT department.
- SFTP Pass - This is the password to access the SFTP server. The user should only have to enter the SFTP password to access the SFTP server.
- EDLink URL - This is the URL of the EDLink STTP server. This should be already defaulted as setup by the IT department.
- Click "Save".
Select JDrive Folder
- Click the field next to "JDrive Folder" and create a folder called "EDLink".
- Single left click on the new "EDLink" folder and click the "Choose" button.
- Click "Save"
Build Files
- Once you create a Option Group and add settings to it, you can build the files.
- Note: You will need to go to the Student, Transcript and Staff tabs first to add settings to the Option Group before building a file set.
- Choose a option group.
- Click "Go!"
Status
- Click status to see the current build status.
- "Current" tab shows jobs in progress or to be done.
- "Complete" tab shows completed jobs.
- You can click on the completed jobs to see errors or warnings.
Send Files
- Click Send once files are built.
Student Main
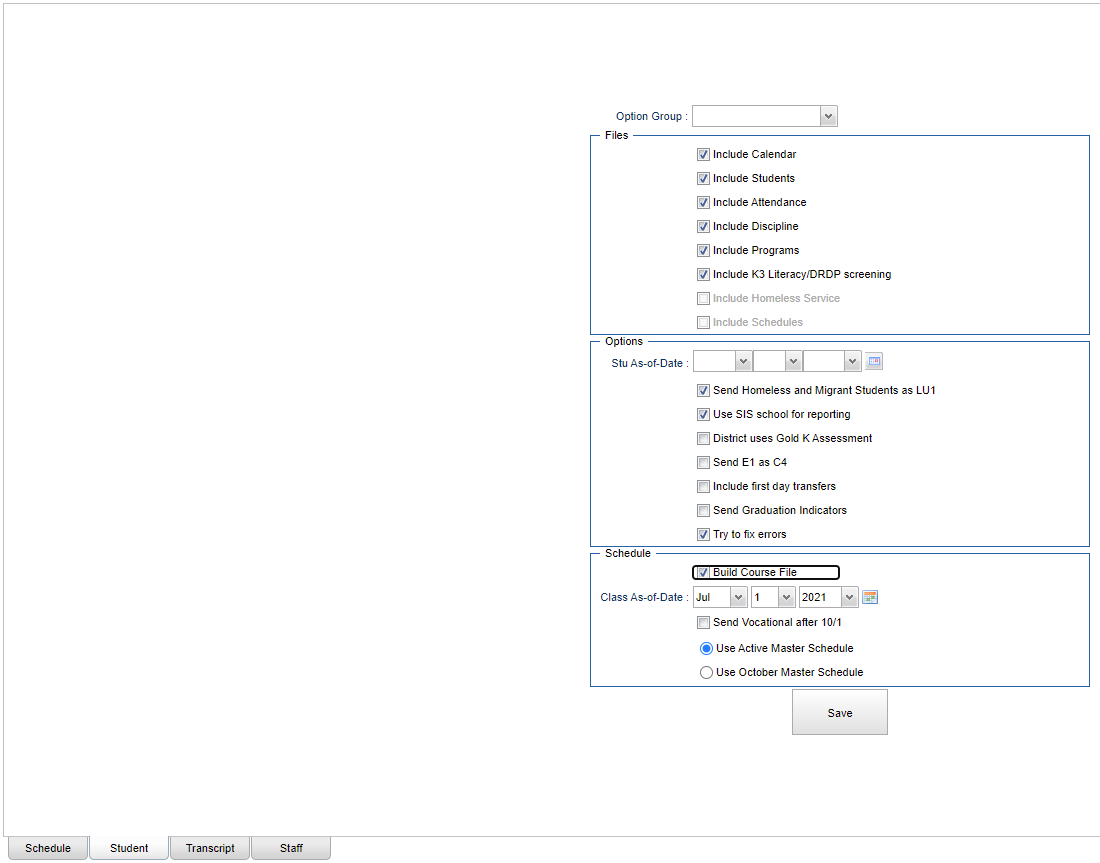
Create options for student files.
Transcript Main
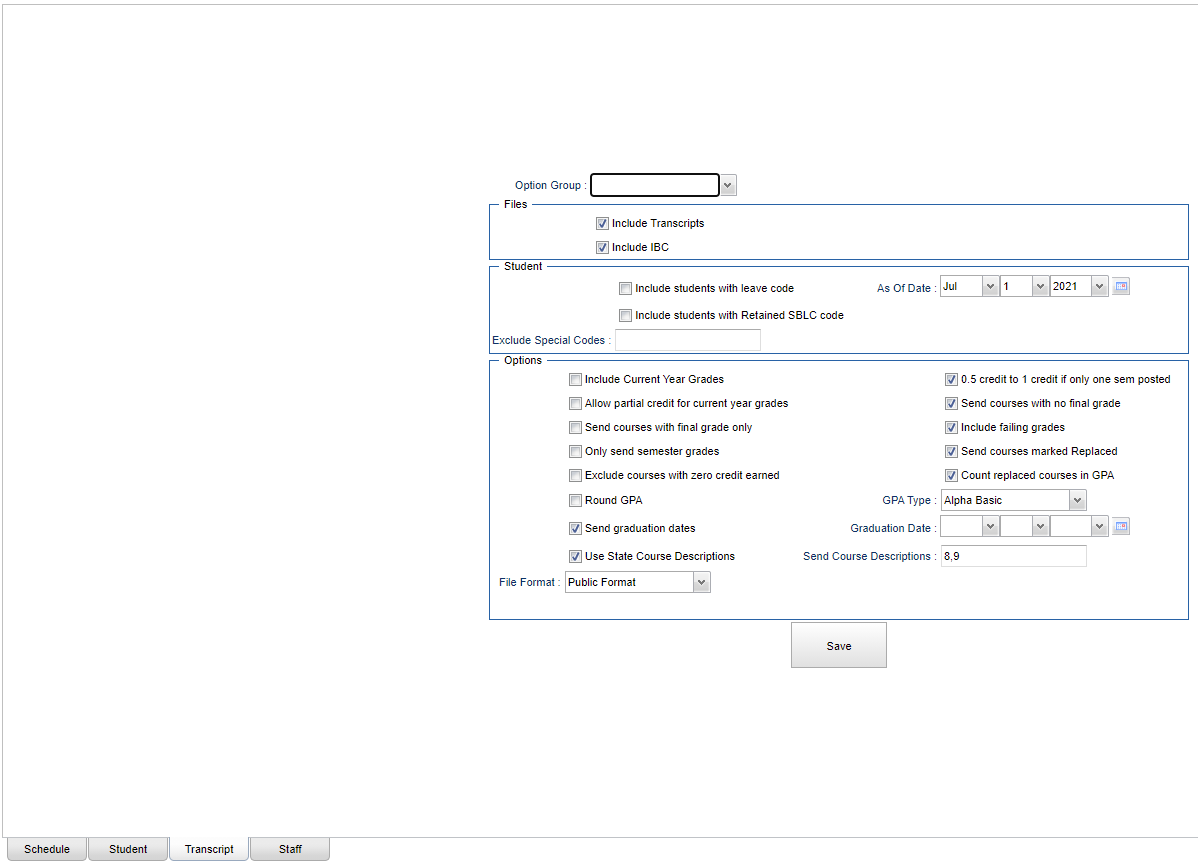
Create options for transcript files.
- Choose a option group at the top and select options.
- Click "Save" when done.
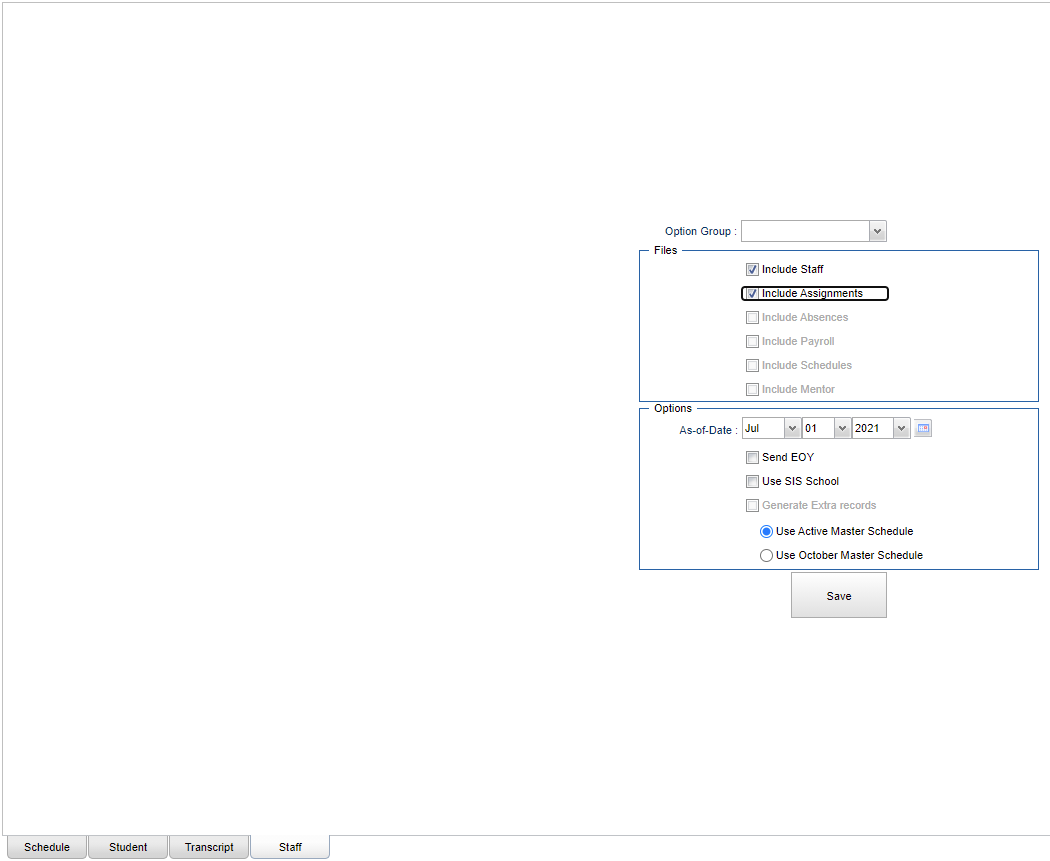
Staff Main
Create options for staff files.
Bottom Tabs
Schedule - Create options, save sftp settings and create scheduled builds.
Student - Create options for student files.
- Choose a option group at the top and select options.
- Click "Save" when done.
Transcript - Create options for transcript files.
- Choose a option group at the top and select options.
- Click "Save" when done
Staff - Create options for staff files.
Bottom
Save - On the Option Groups tab, click to save for options and builds.
Build - On the Option Groups tab, choose the option to build.
Status - On the Option Groups tab, to view the status of the build with tabs of Current and/or Completed.
Send - Click Send once files are built.
