LA Staff UID Mass Export File
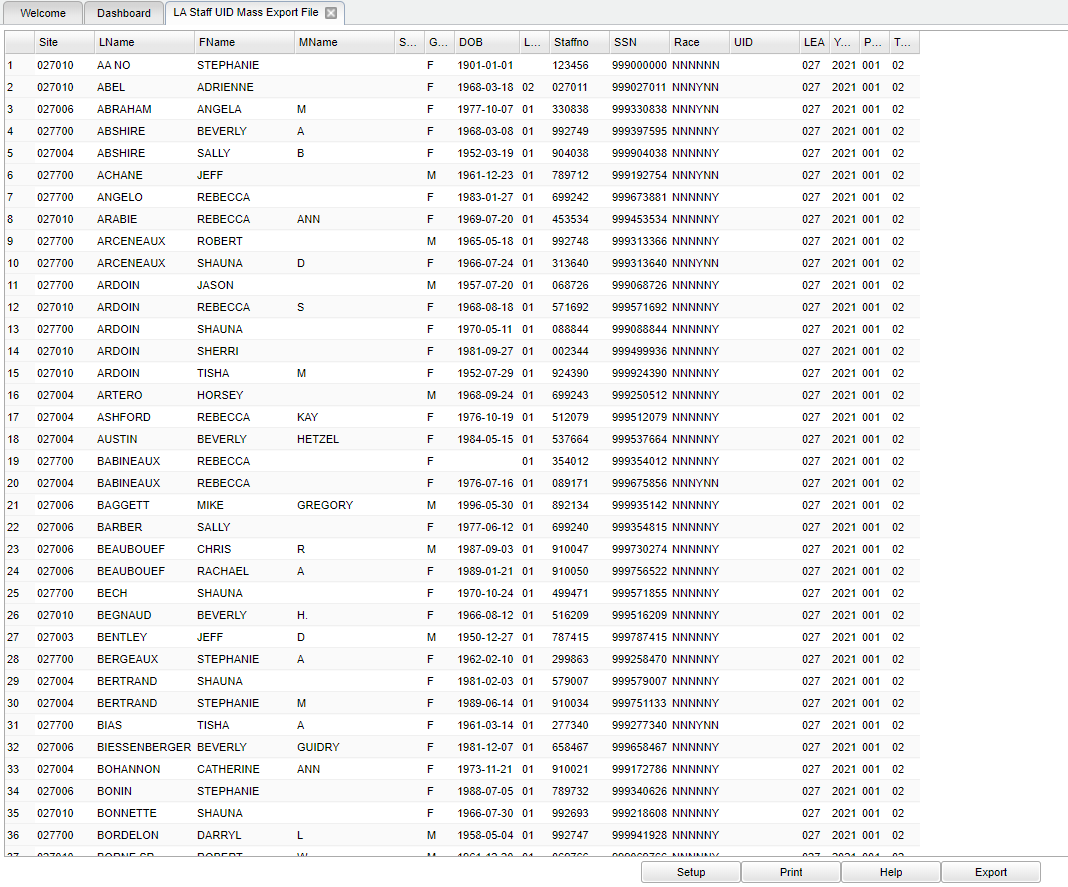
This program will build a file to export staff data for UID creation that is needed to submit to LADOE.
Here is the complete process:
- The LA Staff UID Mass Export File will build a file and then the user will send it to eScholar.
- Then the user would get that file back from eScholar which now has the staff UIDs added to the file.
- Import that file back into our system by using the LA UID Mass Import File.
On the left navigation panel, select Required Reporting > Export > LA Staff UID Mass Export File.
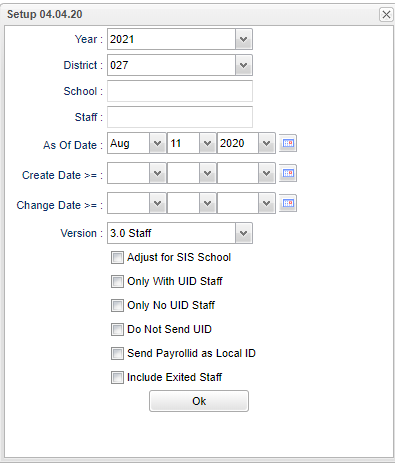
Setup Options
Year - Defaults to the current year. A prior year may be accessed by clicking in the field and making the appropriate selection from the drop down list.
District - Default value is based on the user’s security settings. The user will be limited to their district only.
School - Default value is based on the user’s security settings. If the user is assigned to a school, the school default value will be their school site code.
Staff - Select one or more staff members instead of having to create a full file.
As of Date - This choice will list only those staff who are actively enrolled as of the date selected in the date field.
Create Date >= - Only show/submit staff enrolled on or after this date.
Change Date >= gives the user the ability to build a file based on the last time a student`s record was changed. The user will enter a Change Date on the setup box and the program will list all students whose Student Master record was changed on or after the selected date.
Version - Since the 1718 session, the version should be 3.0 formated file.
- Adjust for SIS School - Check to send staff with the SIS school instead on the enrolled school
- Only with UID Staff - Only show staff with UIDs
- Only No UID Staff - Only show staff with no UIDs
- Do Not Send UID - Do not show or submit UIDs (This is primarily used to correct retired id issues.)
- Send Payroll ID as Local ID - Send the payroll ID as the local ID in the file
- Include Exited Staff - Send exited staff ... this overrides the As of Date and Enroll Date.
Main
Bottom
Setup - Click to go back to the Setup box.
Print - This will allow the user to print the report.
Help - Click to view written instructions and/or videos.
Export - This button allows the user to export the information into a comma separated format. Once the export button is clicked, a preview window will appear. RIGHT click, then click
"Save as", to save the file to a selected location on your computer.

