Create a Bell Schedule
Bell Schedules only need to be entered for schools that do attendance by period. This is commonly high schools and in some cases, middle schools.
- For an A/B type schedule, bell schedules per week for each type, would be needed. Check off the Include days for ADay and then for BDay.
- For a rotating A/B type schedule, a day to day for each type, would be needed. Check off the Include days for ADay and then for BDay.
- Example 1: For a Hybrid A/B schedule, students on Team A will attend Monday and Wednesday, Team B on Tuesday and Thursday, and then the teams will rotate on Fridays. The user would need to create one bell schedule for every week (Dates From and Dates Through dates would be for one week) for their A days and one bell schedule every week for their B days until the end of the school year. Have the Friday be listed every other week per every A or B weekly bell schedule.
- Example 2: For a rotating A/B schedule that the A and/or Bday would change to a different day each week, a bell schedule would need to be made for each day.
Video How-to
How to Create a Bell Schedule
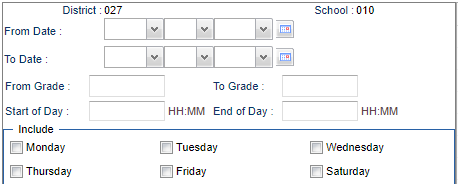
In the upper left, enter the From Date and To Date. Usually, this is the start of school, to the end of school.
Enter the From Grade and To Grade. This will be the grade level(s) of students that this bell schedule will apply to.
Set the Start of Day and End of Day times. Note: Use military time in all time fields.
Click the days of the week that the schedule will be in effect.
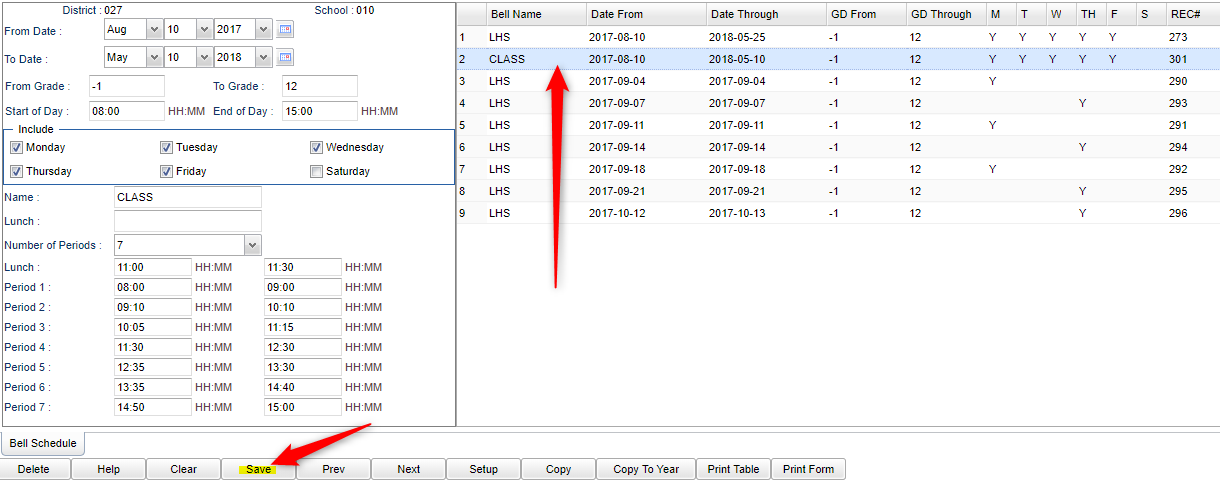
Enter a Name of the bell schedule.
For the Lunch field, enter the number of minutes the lunch period lasts.
Enter the Number of Periods the bell schedule contains. The maximum number of periods will match the highest period in your Master Schedule Editor.
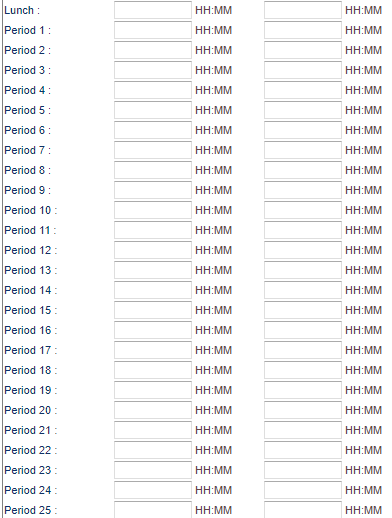
Enter the start and end time of each period in military time. TIP: Leave out the time in between classes.
Enter the start and end time of the Lunch session associated with this bell schedule.
Click the Save button on the lower portion of the screen. After doing so, you will see a row appear with some details about the bell schedule.
To create additional bell schedules, after clicking Save, do one of the following:
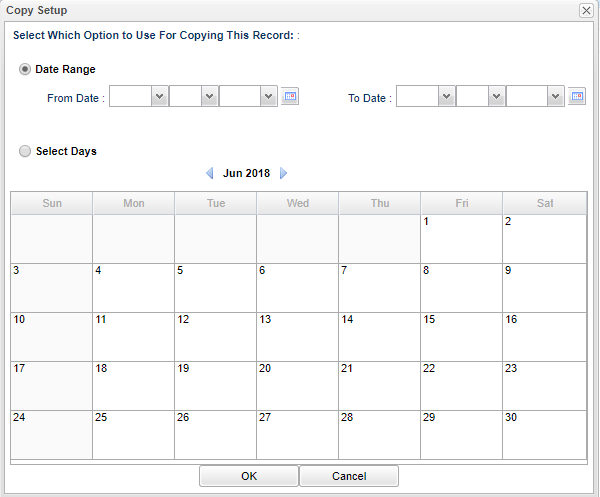
Highlight the current bell schedule row, then click the Copy button. Enter the dates to copy the bell schedule to. Highlight the new bell schedule row, edit with a new Name and other details, then click the Save button.
Start a new bell schedule from scratch by clicking the Clear button, then enter the next bell schedule.
To copy an AB schedule, select the Bell Name from the top. Once the Copy Setup box appears, the following may be done.
To copy a date range, fill in the From Date to To Date. Then select OK.
To copy specific days, click on the day(s) of the calendar. Then select OK.
How to Edit an existing Bell Schedule
Highlight the desired current bell schedule row displayed on the right. The details will show on the left.
Make any needed changes, then click the Save button at the bottom of the screen.


