Update GPA
From EDgearWiki
Jump to navigationJump to searchIt is always a good idea to run this GPA Update prior to running the GPA Ranking Report.
How-to
- The Update GPA program is accessed by clicking the Update GPA button on the GPA Ranking Report. The GPA Ranking Report can be accessed two ways:
- On the left navigation panel of WebPams, click Transcripts, then Lists, then GPA Ranking Report.
- From the Transcript Workstation of a student, click the Action button in the upper right, then select Rank Report.
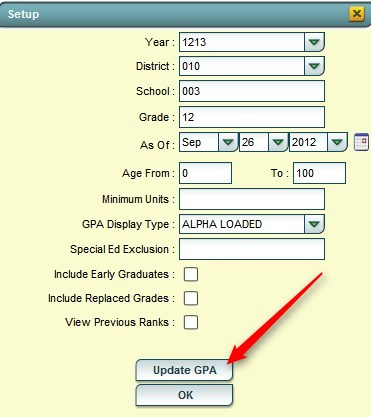
- At the GPA Rank Report setup box, click the Update GPA button as shown below:
Setup Box
- Set the Year, School, and Grade(s), and As of Date (usually current date).
- Use Current Grades: Select if semester / final grades from the current year are to be included in the cumulative gpa calculation.
- 0.5 credit to 1 credit course….: Usually selected. If a single semester of a full credit course is taken, the final will be given with only a .5 credit to match.
- Use Semester grades only: Select if district calculates cumulative gpa only on grades that are in the semester category of a transcript.
- Use Final grades only: Select if district calculates cumulative gpa only on grades that are in the final category of a transcript.
- Include P grade as failures: Normally schools do not select this option.
- Selecting this option will take a P grade and count is as 0 quality points just like an F grade. Normally, schools want a P to simply be left out of the calculation since it has no quality points.
- Click the OK button to begin the calculation.
- A message will be displayed indicating the processing is taking place. The processing will take several minutes.
- When done, close the Update GPA setup box. This will return the user to the GPA Rank Report setup box.
