Difference between revisions of "Enrollment Status Form"
(→Bottom) |
|||
| Line 116: | Line 116: | ||
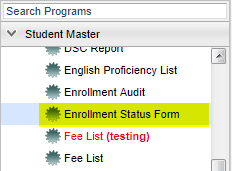
Select '''Enrollment Status Form''' and the Setup Box will appear. | Select '''Enrollment Status Form''' and the Setup Box will appear. | ||
To find definitions for standard setup values, follow this link: [[Standard Setup Options]]. | To find definitions for standard setup values, follow this link: [[Standard Setup Options]]. | ||
| − | For other | + | For other setup values not listed in the standard setup list: |
'''Display SSN'''--Select this check box to include the student SSNs on the status form. | '''Display SSN'''--Select this check box to include the student SSNs on the status form. | ||
Click '''Ok''' to move to the next screen. | Click '''Ok''' to move to the next screen. | ||
Revision as of 07:14, 3 March 2021
These instructions will give you a printout of the form students need for documentation of enrollment.
Video How-to
How to
Menu Location
On the left navigation panel, select Student Master > Lists > Enrollment Status Form.
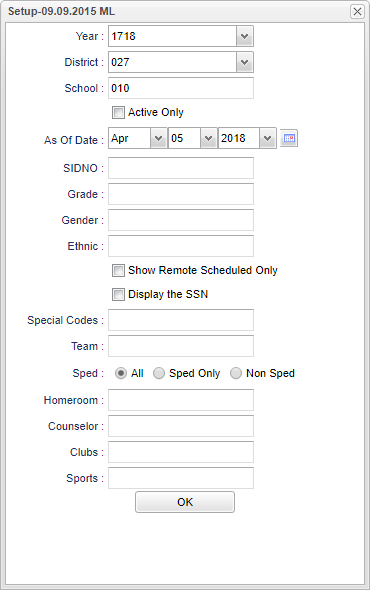
Setup Options
Year - Defaults to the current year. A prior year may be accessed by clicking in the field and making the appropriate selection from the drop down list.
District - Default value is based on the user's security settings. It will be limited to their district only.
School - Default value is based on the user's security settings. If the user is assigned to a school, the school default value will be their school site code.
Active Only - Select this to view only active students.
As of Date - This choice will list only those students who are actively enrolled as of the date selected in the date field.
SIDNO - List of students by Sidno for whom an Enrollment Status Form will be printed. Select one or more students or leave the field blank for all students or check the box at the top of the student list to select all students.
Grade - Leave blank or select all to include all grade levels. Otherwise, choose the desired grade level.
Gender - Leave blank or select all to include all genders. Otherwise, choose the desired gender.
Ethnic - Leave blank or select all to include all ethnicities. Otherwise, choose the desired ethnicity.
Show Remote Only - If this box is checked, the report will list only those students who come to your school from another school in the district.
Display SSN - Show the social security number on the report.
Special Codes - Leave blank if all special codes are to be included in the report. Otherwise, choose the desired special code.
Teams - Leave blank if all team names are to be included in the report. Otherwise, choose the desired team.
Sped:
All - Select to view all students.
Sped Only - Select to view only Sped students.
Non Sped - Select to view only non Sped students.
Homeroom - Leave blank or select all to include all homerooms. Otherwise, choose the desired homeroom.
Counselor - Select the name of the student's counselor.
Clubs - Leave blank if all clubs are to be included in the report. Otherwise, choose the desired club code.
Sports - Leave blank if all sports are to be included in the report. Otherwise, choose the desired sport code.
OK - Click to continue.
To find definitions for standard setup values, follow this link: Standard Setup Options.
Main
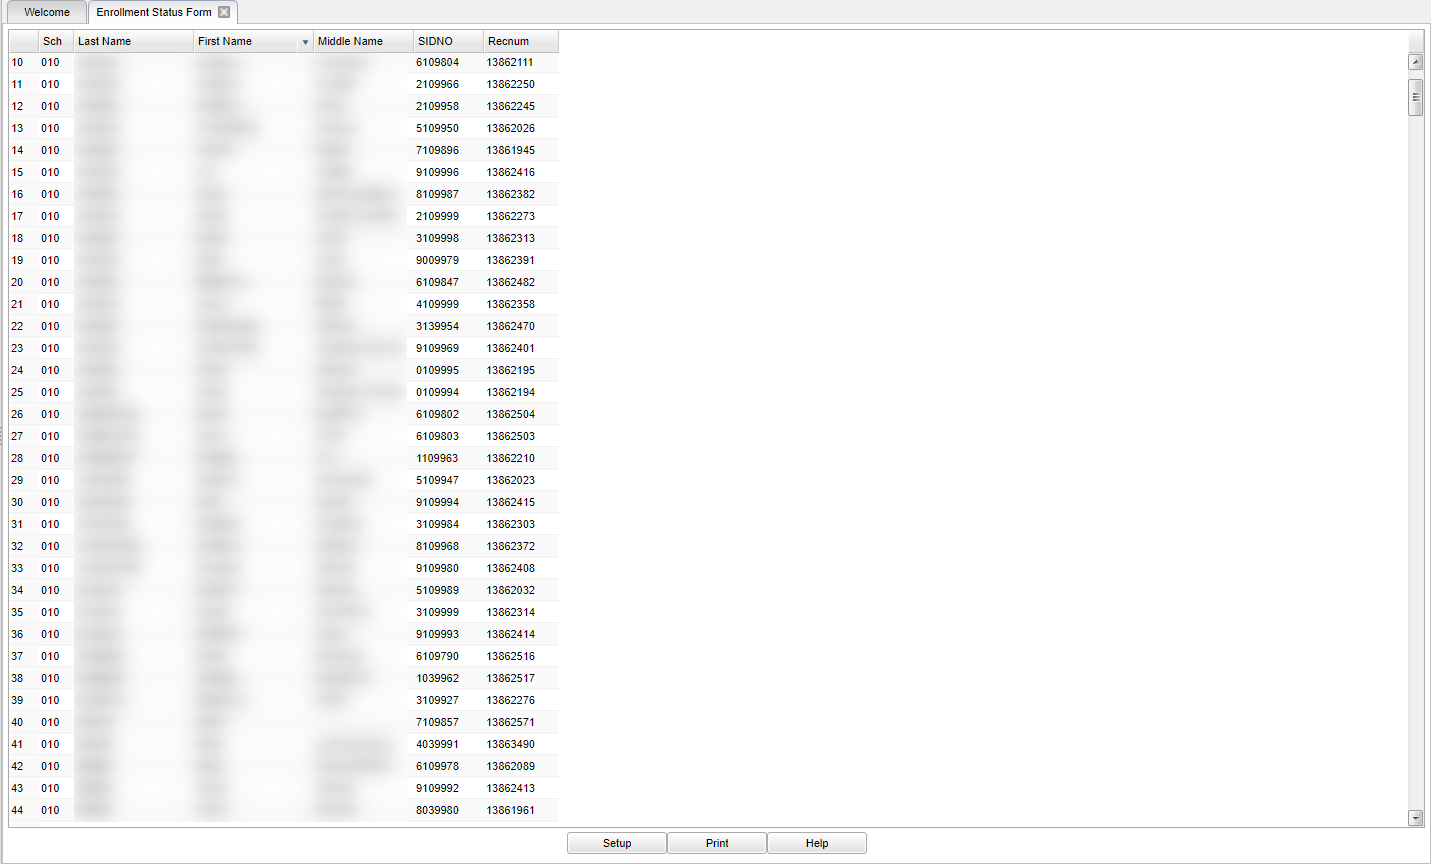
Column Headers
School - School of enrollment.
Last Name - Student's last name.
First Name - Student's first name.
Middle Name - Student's middle name.
SIDNO - Student's identification number.
Recnum - Student's record number.
To find definitions of commonly used column headers, follow this link: Common Column Headers.
Bottom
Setup - Click to go back to the Setup box.
Print - This will allow the user to print the report.
Help - Click to view written instructions and/or videos.
Entry Student Master
Find the student using the Student Master find button or the Search bar. Click the Action button at the upper right of the window. Select Enrollment Status Form from the list of Actions. A print preview will appear on the screen. If there is no gray rectangle at the bottom right of the window, move your cursor to this area and the gray box will appear. Click the printer icon at the right end of the gray box for a print dialog box to appear. Click the Print button at the top left of the screen and this window will disappear. The screen will return to the Student master screen.
Method 2: Printing the form through the menu item under Student Master
Select Lists under the Student Master area on the left of the screen. Select Enrollment Status Form and the Setup Box will appear. To find definitions for standard setup values, follow this link: Standard Setup Options. For other setup values not listed in the standard setup list: Display SSN--Select this check box to include the student SSNs on the status form. Click Ok to move to the next screen. The screen will display the following information:
- The first column will be a number indicating how many records are found matching the criteria based on the setup box. The remaining columns include School, Last Name, First Name, Middle Name, Sidno, Record.
To Print the form click the Print button at the bottom of the screen. A print dialog box appears on the screen. Select the non-editing PDF version. Click Print at the bottom of the window. If there is no gray rectangle at the bottom right of the window, move your cursor to this area and the gray box will appear. Click the printer icon at the right end of the gray box for a print dialog box to appear. Click the Print button at the top right of the screen and this window will disappear. Close the print preview.


