Difference between revisions of "Creating Custom Profiles"
From EDgearWiki
Jump to navigationJump to search (→Bottom) |
|||
| Line 25: | Line 25: | ||
[[File:updateusers.png]] | [[File:updateusers.png]] | ||
| − | + | '''Close''' - Click button at the bottom to close. | |
| + | |||
| + | '''[[Standard Print Options | Print]]''' - This will allow the user to print the report. | ||
To '''copy''' a profile from one school to another click on the '''Copy''' button at the top of the page and select the schools you'd like to use and click the '''Copy''' button. | To '''copy''' a profile from one school to another click on the '''Copy''' button at the top of the page and select the schools you'd like to use and click the '''Copy''' button. | ||
Revision as of 09:24, 30 May 2023
How to Create/Edit/Copy/Custom Profiles and Permissions Using the Profile Template Editor
- Click in the Profile field on the top blank line and enter the two character profile ID for the new profile being created.
- Click in the Name field and enter the profile name for the new profile being created.
- Click in the Desc field and enter the profile description for the new profile being created.
- If the profile will use an existing menu type select either Admin, Teacher or Sped.
- Click the green save button.
- To edit the permissions for the profile click the Edit icon in the column to the right of the Save cell.
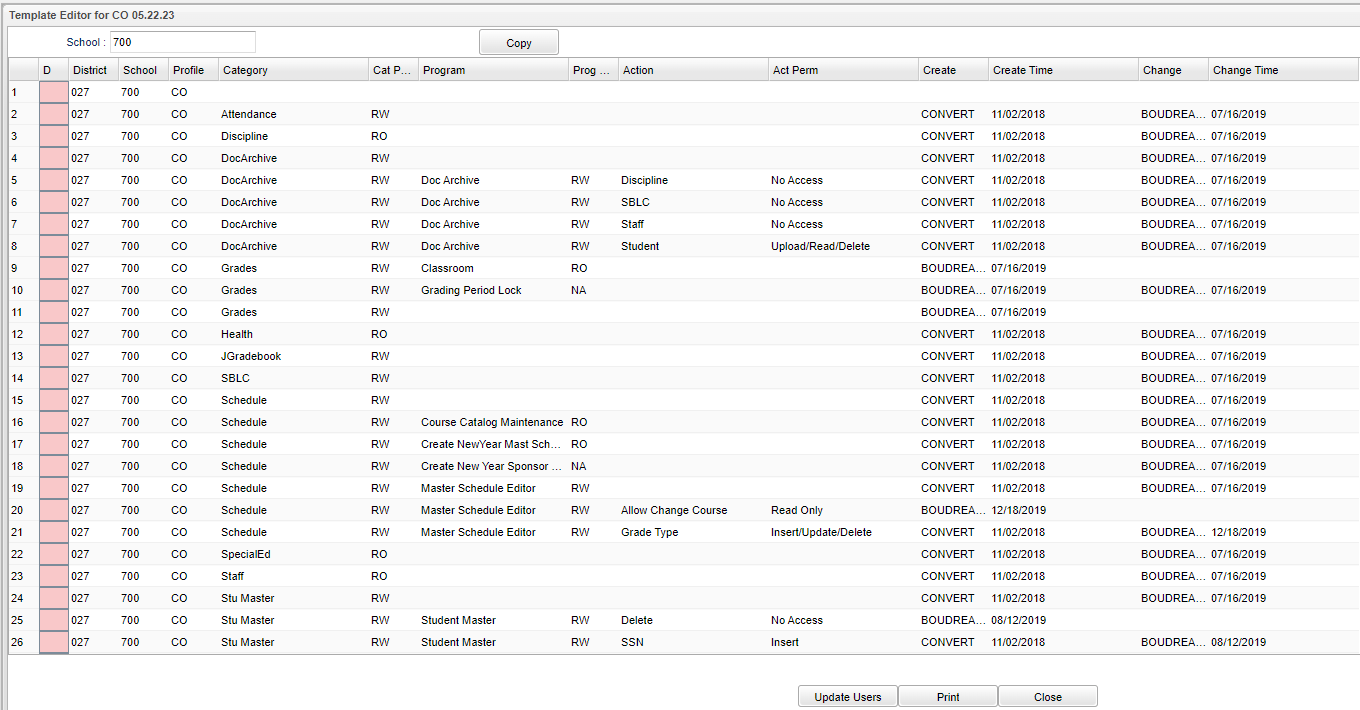
- Click in the Category field on the row for the profile that you need to edit.
- Check/Uncheck NA/RO/RW for each Program Category as needed. (NA-no access, RO-read only, RW-read write)
- Click the Save button at the bottom of the User Permissions window.
- Click in the Program field for the profile that you need to edit.
- Check/Uncheck NA/RO/RW for each Program Category as needed. (NA-no access, RO-read only, RW-read write)
- Click the Save button at the bottom of the User Permissions window.
- Click in the Action field for the profile that you need to edit.
- Check/Uncheck NA/RO/RW for each Program Category as needed. (NA-no access, RO-read only, RW-read write)
- Click the Save button at the bottom of the User Permissions window.
- Click on the Update Users to have the option to choose a school and see a list of staff with that profile. Select the staff and click on "Update Selected" so that they will be updated to the newly edited profile.

Bottom
Update Users - Click to update users. (see below)

Close - Click button at the bottom to close.
Print - This will allow the user to print the report.
To copy a profile from one school to another click on the Copy button at the top of the page and select the schools you'd like to use and click the Copy button.