Difference between revisions of "Entering Contact Information"
From EDgearWiki
Jump to navigationJump to search| (3 intermediate revisions by the same user not shown) | |||
| Line 8: | Line 8: | ||
# '''Show all Years''' - If checked then all log entries from current and previous years will be included. Leave it unchecked to limit log entries to the current year only. | # '''Show all Years''' - If checked then all log entries from current and previous years will be included. Leave it unchecked to limit log entries to the current year only. | ||
# '''Contact Time''' - This denotes the time the record was created by user. | # '''Contact Time''' - This denotes the time the record was created by user. | ||
| − | # If the user wishes to '''edit''' a record created by his/her self, click on the row, change the information, then click '''Save'''. | + | # If the user wishes to '''edit''' a record created by his/her self, click on the row, change the information, then click '''Save'''. Note that it can only be edited by the user who created the record. |
| − | |||
# If the user wishes to '''delete''' a record, there is a red Delete cell on the far right. It can only be deleted by the user who created the record. | # If the user wishes to '''delete''' a record, there is a red Delete cell on the far right. It can only be deleted by the user who created the record. | ||
| − | # [[Standard Print Options | Print]] allows the user to print the contact records for the student. The '''Print Setup Box''' (see below) gives the user the | + | # [[Standard Print Options | Print]] allows the user to print the contact records for the student. The '''Print Setup Box''' (see below) gives the user the option to choose which reason to print. (Attendance, Discipline, Grades, Other, or mix) But the user is not required to select a Contact Reason and can just click OK. |
[[File:contactlogprintsetup.png]] | [[File:contactlogprintsetup.png]] | ||
| + | |||
| + | |||
| + | '''Q & A''' | ||
| + | |||
| + | '''Q''' - Is there a limit to the number of entries for a student in the Parent Contact Log? | ||
| + | |||
| + | '''A''' - Operationally, there is no limit to the number of parent communication log records. | ||
| + | |||
Latest revision as of 17:12, 5 December 2023
- Click the New button on the Parent Contact Log screen to start a new entry.
- Select the Contact Type.
- Select the Contact Date.
- Select the Contact Relation.
- Enter any details in the Log Recording section.
- Click the Save button.
- Select Show JCall Messages to show all messages.
- Show all Years - If checked then all log entries from current and previous years will be included. Leave it unchecked to limit log entries to the current year only.
- Contact Time - This denotes the time the record was created by user.
- If the user wishes to edit a record created by his/her self, click on the row, change the information, then click Save. Note that it can only be edited by the user who created the record.
- If the user wishes to delete a record, there is a red Delete cell on the far right. It can only be deleted by the user who created the record.
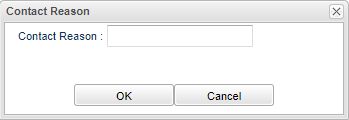
- Print allows the user to print the contact records for the student. The Print Setup Box (see below) gives the user the option to choose which reason to print. (Attendance, Discipline, Grades, Other, or mix) But the user is not required to select a Contact Reason and can just click OK.
Q & A
Q - Is there a limit to the number of entries for a student in the Parent Contact Log?
A - Operationally, there is no limit to the number of parent communication log records.
