Difference between revisions of "Vendor Editor"
| (31 intermediate revisions by the same user not shown) | |||
| Line 1: | Line 1: | ||
| − | ''' | + | '''These instructions will provide the steps for creating new vendor records, editing existing records or deleting vendor records.''' |
| + | '''A user [[must]] be given permission to insert/update/delete/edit vendor records with the vendor number. Follow the next set of instructions to edit a user's permissions. There are two other levels of permission that can be set for a user: No Access and Read Only. For No Access the Vendor Editor item will NOT be listed on the Action Menu. The Read Only item will be listed.''' | ||
| + | |||
| + | [[File:fundsactionbutton.png]] | ||
| + | |||
| + | [[File:vendoreditor.png]] | ||
| + | |||
| + | #The district security person will need to change a user's security settings. Follow these instructions for making the necessary security changes. | ||
| + | #Go to System/Entry/User Management. | ||
| + | #On the setup box verify the year and select the school. | ||
| + | #Click '''OK'''. | ||
| + | #'''Find''' the User that needs permissions changed. | ||
| + | #This user will probably have '''RW''' permission for the '''Finance Category''' unless he/she is a new user to JCampus. | ||
| + | #On the line with '''Finance Category''', click the '''Program cell''' and select '''RW''' for Post Transactions. Then, click '''Save'''. | ||
| + | #A popup will appear to verify whether you want to save changes for ALL users with the same profile as the selected user. | ||
| + | #The answer is usually '''No'''. | ||
| + | #On the same line to the right, click the Action cell and select the appropriate action--'''No Access, Read Only, Insert/Update/Delete'''. Then, click '''Save'''. | ||
| + | #A popup will appear to verify whether you want to save changes for ALL users with the same profile as the selected user. | ||
| + | #The answer is usually '''No'''. | ||
| + | |||
| + | |||
| + | |||
| + | '''Instructions to create new Vendor records, edit existing Vendor records, or delete existing Vendor records.''' | ||
#Select '''Funds''' from the area on the left side of the screen. | #Select '''Funds''' from the area on the left side of the screen. | ||
#Under Entry select '''Post Transaction'''. | #Under Entry select '''Post Transaction'''. | ||
#The default District and School information will be based on your security settings. | #The default District and School information will be based on your security settings. | ||
| − | |||
#Complete the '''Setup box''' and click '''Ok'''. | #Complete the '''Setup box''' and click '''Ok'''. | ||
#Click the '''Action''' button at the top right of the screen. | #Click the '''Action''' button at the top right of the screen. | ||
#Select '''Vendor Editor'''. | #Select '''Vendor Editor'''. | ||
#The Vendor list will appear on the screen. | #The Vendor list will appear on the screen. | ||
| − | |||
| − | |||
| − | |||
| − | |||
#All new Vendor records will be created for Site 700 and will be available for all schools. | #All new Vendor records will be created for Site 700 and will be available for all schools. | ||
| − | # | + | #Click the '''New''' button at the bottom of the popup list. |
| + | #The Vend No (number) cell will become an active cell. | ||
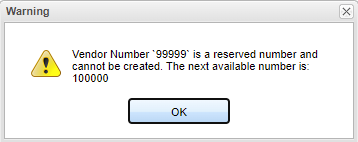
| + | #Vendor # "99999" is a reserved number and cannot be used. When a user tries to update a vendor # to "99999" this warning message will popup and the original number gets placed back in the cell.[[File:vendoreditorwarning.png]] | ||
| + | #*'''Special Note'''--If you leave the number blank and complete the remaining information about the new vendor, the system will automatically generate a unique number for this new vendor. | ||
#Enter information for each of the following fields listed below. Some of the fields are optional. If a field is not listed, it is not used. | #Enter information for each of the following fields listed below. Some of the fields are optional. If a field is not listed, it is not used. | ||
| − | #* | + | #*Vend No. |
#*Vendor Name | #*Vendor Name | ||
#*Address 1 | #*Address 1 | ||
| Line 35: | Line 55: | ||
#Click the green save cell at the right end of the new record. | #Click the green save cell at the right end of the new record. | ||
| − | |||
| + | '''NOTE'''--If the Vendor Number that you've selected is already in use by any of the schools in your district, the next available number will be entered in the vendor number field. Click Save cell again. | ||
| + | |||
| + | |||
| + | |||
| + | '''To edit an existing Vendor record follow this section of instructions.''' | ||
| + | #Open Transaction Posting. | ||
| + | #Click the Action button and select '''Vendor Editor'''. | ||
| + | #Find the Vendor that needs to be edited. | ||
| + | #Update missing information or edit existing information. | ||
| + | #Click the green save cell at the right end of the record. | ||
| + | |||
| + | |||
| + | |||
| + | '''To Delete an existing Vendor record follow this section of instructions.''' | ||
| + | #Open Transaction Posting. | ||
| + | #Click the Action button and select '''Vendor Editor'''. | ||
| + | #Find the Vendor that needs to be deleted. | ||
| + | #Click the pink cell at the '''left''' end of the record. | ||
| + | #There will be a confirmation popup appear on the screen. | ||
| + | #To exit out of the delete process, click the '''No''' button. | ||
| + | #To delete the record, click the '''Yes''' button. | ||
| + | |||
| + | |||
| + | |||
| + | |||
| + | '''Print the Vendor List''' | ||
| + | |||
| + | #Click the '''Print''' button at the bottom of the screen. | ||
| + | #Click the printer icon at the top right. Another print servlet will appear. | ||
| + | #Click the print button at the top left to print the report. Close the original print servlet window. | ||
| + | |||
| + | |||
| + | ---- | ||
| + | [[Funds|'''Funds''' Main Page]] | ||
| − | + | ---- | |
| − | + | [[WebPams|'''JCampus''' Main Page]] | |
| − | |||
| − | |||
| − | |||
| − | |||
| − | |||
Latest revision as of 10:36, 18 May 2022
These instructions will provide the steps for creating new vendor records, editing existing records or deleting vendor records.
A user must be given permission to insert/update/delete/edit vendor records with the vendor number. Follow the next set of instructions to edit a user's permissions. There are two other levels of permission that can be set for a user: No Access and Read Only. For No Access the Vendor Editor item will NOT be listed on the Action Menu. The Read Only item will be listed.


- The district security person will need to change a user's security settings. Follow these instructions for making the necessary security changes.
- Go to System/Entry/User Management.
- On the setup box verify the year and select the school.
- Click OK.
- Find the User that needs permissions changed.
- This user will probably have RW permission for the Finance Category unless he/she is a new user to JCampus.
- On the line with Finance Category, click the Program cell and select RW for Post Transactions. Then, click Save.
- A popup will appear to verify whether you want to save changes for ALL users with the same profile as the selected user.
- The answer is usually No.
- On the same line to the right, click the Action cell and select the appropriate action--No Access, Read Only, Insert/Update/Delete. Then, click Save.
- A popup will appear to verify whether you want to save changes for ALL users with the same profile as the selected user.
- The answer is usually No.
Instructions to create new Vendor records, edit existing Vendor records, or delete existing Vendor records.
- Select Funds from the area on the left side of the screen.
- Under Entry select Post Transaction.
- The default District and School information will be based on your security settings.
- Complete the Setup box and click Ok.
- Click the Action button at the top right of the screen.
- Select Vendor Editor.
- The Vendor list will appear on the screen.
- All new Vendor records will be created for Site 700 and will be available for all schools.
- Click the New button at the bottom of the popup list.
- The Vend No (number) cell will become an active cell.
- Vendor # "99999" is a reserved number and cannot be used. When a user tries to update a vendor # to "99999" this warning message will popup and the original number gets placed back in the cell.
- Special Note--If you leave the number blank and complete the remaining information about the new vendor, the system will automatically generate a unique number for this new vendor.
- Enter information for each of the following fields listed below. Some of the fields are optional. If a field is not listed, it is not used.
- Vend No.
- Vendor Name
- Address 1
- Address 2
- City
- State
- Zip
- Zip4 (optional)
- Phone Area Code (optional)
- Phone (optional)
- Phone Ext (optional)
- Fax Area Code (optional)
- Fax (optional)
- Supplier No (optional): This is used for the SSN for vendors that must receive the IRS Form 1099
- 1099 R: Check this box if the vendor must receive the IRS Form 1099
- The Term Code, Credit Limit, Curr Bal, Class, Misc and Misc 2 fields are not used. These fields should be left blank.
- Click the green save cell at the right end of the new record.

NOTE--If the Vendor Number that you've selected is already in use by any of the schools in your district, the next available number will be entered in the vendor number field. Click Save cell again.
To edit an existing Vendor record follow this section of instructions.
- Open Transaction Posting.
- Click the Action button and select Vendor Editor.
- Find the Vendor that needs to be edited.
- Update missing information or edit existing information.
- Click the green save cell at the right end of the record.
To Delete an existing Vendor record follow this section of instructions.
- Open Transaction Posting.
- Click the Action button and select Vendor Editor.
- Find the Vendor that needs to be deleted.
- Click the pink cell at the left end of the record.
- There will be a confirmation popup appear on the screen.
- To exit out of the delete process, click the No button.
- To delete the record, click the Yes button.
Print the Vendor List
- Click the Print button at the bottom of the screen.
- Click the printer icon at the top right. Another print servlet will appear.
- Click the print button at the top left to print the report. Close the original print servlet window.