Difference between revisions of "Bell Schedule Maintenance"
From EDgearWiki
Jump to navigationJump to search| Line 11: | Line 11: | ||
At the setup box, set the '''Current Year''' and '''School'''. Click the '''OK''' button to begin. | At the setup box, set the '''Current Year''' and '''School'''. Click the '''OK''' button to begin. | ||
| + | |||
| + | ==Main== | ||
| + | |||
| + | [[image:bellscheduletopmain.PNG]] | ||
==Bottom== | ==Bottom== | ||
Revision as of 08:23, 27 June 2018
Menu Location
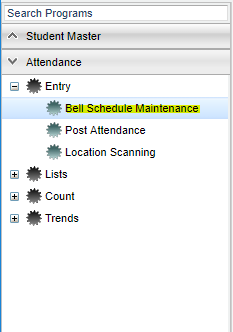
On the left navigation panel, select Attendance > Entry > Bell Schedule Maintenance.
Setup Options
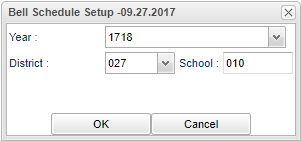
At the setup box, set the Current Year and School. Click the OK button to begin.
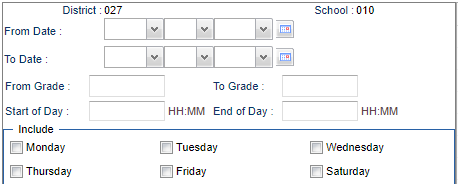
Main
Bottom
Delete - Delete schedule(s)
Help - Click the Help button on the bottom of the page to view written instructions and/or videos.
Clear - Click to clear any information
Save - Click to save information
Prev - Click to go to previous schedule
Next - Click to go to next schedule
Setup - Click to go back to the Setup box.
Copy - Click to copy schedule(s)
Copy to Year - Click to copy previous year schedule(s)
Print Table -
Print Form -
Bell Schedule Maintenance Main Page


